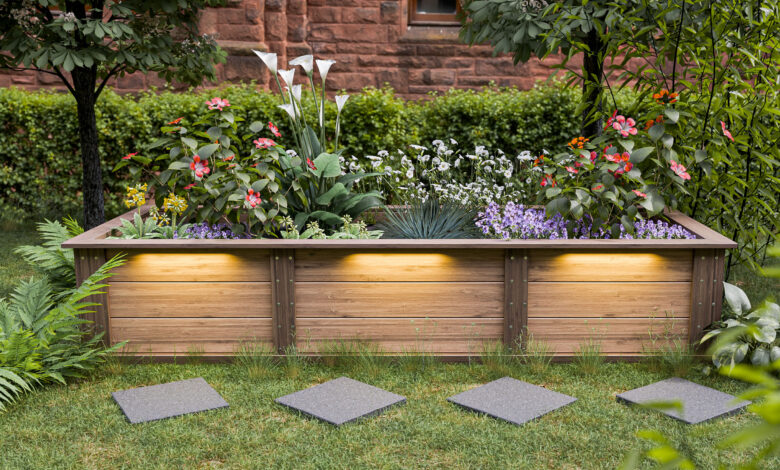
Creating DIY raised garden beds has become one of the most popular gardening trends among home gardeners seeking to maximize their harvest while minimizing maintenance. These elevated growing systems offer superior drainage, better soil control, and easier access compared to traditional in-ground gardens. Whether you’re a beginner gardener or an experienced horticulturist, building your own raised garden beds provides an excellent foundation for growing healthy vegetables, herbs, and flowers.
Raised bed gardening offers numerous advantages that make it an ideal choice for modern homeowners. The controlled environment allows you to customize your soil mixture, ensuring optimal growing conditions for your plants. Additionally, the elevated design reduces strain on your back and knees, making gardening more accessible for people of all ages and physical abilities. The contained growing space also helps prevent soil compaction and makes it easier to implement crop rotation strategies.
One of the most compelling reasons to choose DIY garden beds is the cost-effectiveness compared to purchasing pre-made options. By building your own raised beds, you can customize the dimensions to fit your specific space requirements while selecting materials that align with your budget and aesthetic preferences. This hands-on approach also ensures that you understand every aspect of your garden’s construction, making future maintenance and modifications much simpler.
The versatility of raised bed construction means you can adapt the design to work in various environments, from small urban balconies to expansive suburban yards. These elevated growing systems can be built on concrete, grass, or even rocky terrain, making them an excellent solution for challenging growing conditions. Furthermore, the defined borders of raised beds make it easier to implement integrated pest management strategies and maintain organized garden layouts.
This comprehensive guide will walk you through every aspect of creating professional-quality raised garden beds using readily available materials and basic woodworking skills. From selecting the right lumber and hardware to proper soil preparation and planting techniques, you’ll learn everything needed to build durable, productive garden beds that will serve your growing needs for years to come.
Why Choose Raised Garden Beds
Raised bed gardening offers significant advantages over traditional ground-level growing methods. The elevated design provides superior drainage, preventing waterlogged roots that can lead to plant diseases and poor growth. This improved water management is particularly beneficial in areas with heavy clay soil or regions that experience frequent rainfall.
The contained growing environment of DIY raised garden beds allows for precise soil composition control. You can create the perfect growing medium by combining quality topsoil, compost, and amendments tailored to your specific crops’ needs. This customization eliminates the guesswork associated with improving existing soil conditions and ensures optimal plant nutrition from the start.
Garden bed construction at an elevated height significantly reduces physical strain during planting, weeding, and harvesting activities. This ergonomic advantage makes gardening more enjoyable and accessible, particularly for individuals with mobility limitations or back problems. The defined borders also create clear pathways, preventing soil compaction from foot traffic.
Pest and weed management becomes more manageable with raised garden beds. The elevated growing surface makes it easier to spot and address pest issues early, while the contained environment allows for targeted treatments without affecting surrounding areas. Additionally, starting with a fresh soil mix reduces existing weed seed populations, resulting in cleaner garden beds requiring less maintenance.
Essential Materials and Tools
Wood Selection for Raised Beds
Choosing the right lumber is crucial for building durable DIY raised garden beds that will withstand outdoor conditions for years. Cedar and redwood are naturally rot-resistant, untreated wood options that can last 10+ years, making them excellent long-term investments despite higher initial costs.


Cedar lumber remains the gold standard for raised bed construction due to its natural oils that repel insects and resist decay. Western red cedar boards provide exceptional durability and weather resistance while maintaining their structural integrity throughout multiple growing seasons. The natural antimicrobial properties of cedar also help prevent soil-borne diseases that could affect plant health.
For budget-conscious gardeners, untreated pine or fir lumber offers an economical alternative for garden bed construction. Pine and fir will break down more quickly, but are available at a fraction of the cost compared to premium cedar or redwood options. These softwood options typically last 3-5 years before requiring replacement, making them suitable for gardeners who prefer to rebuild periodically.
Pressure-treated lumber remains a controversial choice for vegetable gardens. While modern pressure-treated wood uses safer chemical treatments than older formulations, many gardeners prefer avoiding treated lumber entirely when growing food crops. The EPA banned the sale of lumber treated with chromated copper arsenate (CCA) for residential use in 2003, but concerns about chemical leaching continue to influence material choices.
Hardware and Fasteners
Selecting appropriate hardware ensures your DIY garden beds maintain structural integrity throughout multiple growing seasons. Galvanized or stainless steel screws provide superior corrosion resistance compared to standard steel fasteners, preventing premature failure due to moisture exposure.
Exterior-grade wood screws in 2.5-inch to 3-inch lengths work best for assembling standard raised garden bed frames. These screws provide adequate penetration into corner joints while remaining easy to remove if modifications become necessary. Pre-drilling pilot holes prevents wood splitting, particularly when working with harder wood species like cedar.
Corner brackets or metal reinforcement plates add extra stability to raised bed construction, especially for larger beds that will contain significant soil weight. These hardware pieces distribute load forces more evenly across joint connections, reducing stress on individual fasteners and extending overall structure lifespan.
Required Tools
Basic woodworking tools are sufficient for most DIY raised garden bed projects. A circular saw or miter saw enables precise lumber cutting, while a drill/driver combination handles pilot holes and screw installation efficiently. A level ensures proper bed alignment, and measuring tools guarantee accurate dimensions.
Safety equipment, including eye protection, hearing protection, and work gloves, should be used throughout the construction process. These protective measures prevent injuries and make the building experience more comfortable, particularly during extended work sessions.
Planning Your Raised Garden Bed
Size and Dimensions
Proper sizing ensures your raised garden beds provide adequate growing space while remaining manageable for maintenance activities. Standard bed widths of 3-4 feet allow comfortable reach from both sides without stepping on the growing area, preventing soil compaction and plant damage.
Length dimensions can be customized to fit available space, though beds longer than 8 feet may require additional support posts to prevent bowing under soil weight. Garden bed construction with manageable lengths also makes it easier to install covers or trellising systems when needed for crop protection or support.
Depth requirements vary depending on planned crops, but 8-12 inches provides sufficient root space for most vegetables and herbs. Deeper beds accommodate root crops like carrots and parsnips, while shallow beds work well for lettuce, radishes, and other quick-growing crops with minimal root systems.
Location Considerations
Raised bed gardening success depends heavily on proper site selection. Most vegetables require 6-8 hours of direct sunlight daily, making south-facing locations ideal for maximum light exposure. Avoid areas that receive shade from buildings, trees, or other structures during peak growing hours.
Drainage considerations are critical for DIY garden beds, even with their elevated design. Avoid low-lying areas where water naturally collects, as this can lead to waterlogged conditions despite the raised construction. Gentle slopes that promote water runoff work well for raised bed placement.
Access to water sources simplifies maintenance and irrigation tasks. Positioning raised garden beds within a reasonable distance of hose connections or irrigation systems reduces the labor involved in regular watering routines. Consider future expansion plans when selecting locations to ensure adequate space for additional beds.
Step-by-Step Construction Guide
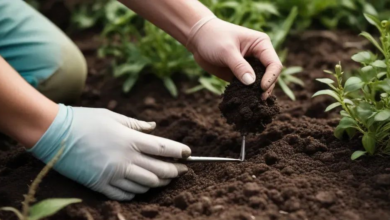
Step 1: Preparing the Site
Begin your raised garden bed construction by marking the planned bed location using spray paint or stakes and string. Clear the area of grass, weeds, and debris to create a level foundation for your bed frame. While raised bed gardening doesn’t require extensive soil preparation, removing existing vegetation prevents weeds from growing up through the bed.
Level the ground surface using a rake and shovel, removing high spots and filling low areas to create an even base. A slight slope for drainage is acceptable, but significant variations in ground level can cause structural problems as the bed settles over time.
Consider installing landscape fabric or cardboard as a weed barrier beneath your DIY raised garden beds. This barrier suppresses existing vegetation while still allowing water drainage and beneficial soil organism movement. Avoid solid plastic barriers that can impede drainage and create waterlogged conditions.
Step 2: Cutting the Lumber
Measure and mark your lumber pieces according to your planned bed dimensions before making any cuts. Standard raised garden bed designs use four boards for the sides, with longer boards for the length and shorter boards for the width dimensions.
Use a circular saw or miter saw to make clean, straight cuts in your lumber. Use the thickest wood you can afford—ideally 2 inches thick for maximum durability and structural strength. Smooth any rough edges with sandpaper to prevent splinters during assembly and use.
Pre-drill pilot holes at each corner location to prevent wood splitting during assembly. Position holes approximately 1 inch from board ends and space multiple holes vertically if using wider boards. This preparation step ensures clean screw installation and reduces the risk of lumber damage.
Step 3: Assembly Process
Assemble your raised bed construction on a flat surface to ensure square corners and proper alignment. Start by connecting the corner joints using your pre-drilled pilot holes and exterior-grade screws. Check measurements diagonally to confirm the frame is square before fully tightening all connections.
For added stability, consider installing corner posts or brackets at each joint. These reinforcements distribute load forces more evenly and prevent corner separation under the weight of soil and water. Metal corner brackets work particularly well for DIY garden beds that will be moved periodically.
Test fit your assembled frame in the prepared location, making any necessary adjustments to ensure level placement. The completed frame should sit solidly on the ground without rocking or gaps that could cause settling issues over time.
Step 4: Installation and Leveling
Position your completed raised garden bed frame in the prepared location and check for level using a standard carpenter’s level. Adjust the ground surface as needed to eliminate rocking or uneven placement that could cause structural stress.
For permanent installations, consider anchoring your DIY raised garden beds using stakes or rebar driven through the frame sides into the ground. This anchoring prevents shifting during freeze-thaw cycles or extreme weather events while maintaining the bed’s structural integrity. Install any additional features like corner posts or trellis supports at this stage, before adding soil. These elements are much easier to install with an empty bed and proper access to all sides of the structure.
Soil Preparation and Filling
Soil Mix Components
Creating the ideal soil mixture is crucial for raised bed gardening success. A balanced combination of topsoil, compost, and drainage amendments provides the foundation for healthy plant growth while maintaining proper moisture levels and nutrient availability.
Quality topsoil should comprise 40-50% of your total soil mix, providing the basic growing medium and mineral content plants need. Avoid using soil from unknown sources that may contain contaminants, weed seeds, or disease organisms that could cause problems in your raised garden beds.
Compost adds organic matter and beneficial microorganisms that improve soil structure and nutrient cycling. Well-aged compost should make up 25-35% of your soil mix, providing slow-release nutrients and improving water retention without creating waterlogged conditions.
Drainage and Amendments
Proper drainage prevents root rot and other moisture-related problems in DIY garden beds. Coarse materials like perlite, vermiculite, or coarse sand can be added to heavy soil mixtures to improve drainage and prevent compaction over time.
Consider adding specific amendments based on your planned crops and local soil conditions. Bone meal provides phosphorus for root development, while kelp meal adds trace minerals and growth hormones that promote healthy plant development.
The ideal soil mixture should drain well while retaining adequate moisture for plant growth. A properly prepared soil mix will feel crumbly in your hand and allow water to penetrate easily without becoming soggy or waterlogged.
Filling Techniques
Fill your raised garden beds gradually, adding soil in 4-6 inch layers and watering lightly between additions. This layered approach helps settle the soil evenly and identifies any low spots that need additional material before planting.
Leave approximately 1-2 inches of space between the soil surface and the top of your bed frame. This border prevents soil spillover during watering and allows for natural settling that occurs during the first growing season. Water the filled bed thoroughly to identify any settling or drainage issues before planting. Properly prepared soil should absorb water readily and drain without creating standing water or extremely dry spots.
Planting and Layout Strategies
Crop Selection for Raised Beds
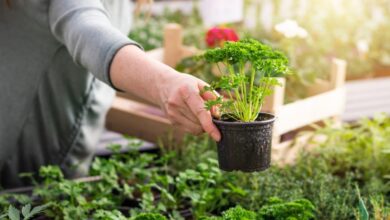
Raised bed gardening accommodates a wide variety of vegetables, herbs, and flowers with excellent results. Root crops like carrots, beets, and radishes particularly benefit from the loose, well-draining soil conditions that raised beds provide.
Leafy greens, including lettuce, spinach, and kale, thrive in the controlled environment of DIY raised garden beds. These crops appreciate the consistent moisture levels and protection from soil-borne pests that elevated growing provides.
Consider plant spacing requirements when selecting crops for your raised garden beds. Intensive planting methods work well in the controlled environment, but adequate air circulation remains important for preventing disease issues.
Companion Planting
Maximize your raised bed gardening productivity by implementing companion planting strategies that optimize space utilization and plant health. Tall plants like tomatoes can provide shade for heat-sensitive crops while maximizing vertical growing space.
Nitrogen-fixing plants such as beans and peas improve soil fertility for neighboring crops while making efficient use of available growing space. These beneficial plant relationships reduce the need for synthetic fertilizers while improving overall garden productivity.
Plan your plant combinations based on growth habits, nutrient requirements, and harvest timing to ensure compatibility throughout the growing season. Proper companion planting transforms your DIY garden beds into highly productive growing systems.
Succession Planting
Implement succession planting techniques to maintain continuous harvests throughout the growing season. Plant new seeds every 2-3 weeks for crops like lettuce, radishes, and beans to ensure steady production rather than overwhelming harvest periods.
Use quick-growing crops to fill gaps between slower-maturing plants, maximizing the productivity of your raised garden beds. This intensive growing approach takes advantage of the excellent growing conditions that elevated beds provide. Plan your succession plantings based on each crop’s days to maturity and your local frost dates. This timing ensures optimal use of your growing season while preventing crop losses due to weather extremes.
Maintenance and Seasonal Care

Watering Systems
Efficient irrigation is essential for raised bed gardening success, as elevated beds tend to drain more quickly than ground-level gardens. Drip irrigation systems work particularly well for DIY raised garden beds, providing consistent moisture while minimizing water waste.
Soaker hoses offer an economical alternative to drip systems while providing even water distribution throughout your raised garden beds. These porous hoses can be laid directly on the soil surface and covered with mulch for optimal efficiency.
Monitor soil moisture regularly, especially during hot weather when raised beds dry out more quickly than traditional gardens. The well-draining nature of raised bed construction requires more frequent watering but allows for precise moisture control.
Mulching Techniques
Apply organic mulch to conserve moisture, suppress weeds, and regulate soil temperature in your raised garden beds. Suitable mulching materials include straw, grass clippings, shredded leaves, and composted bark chips. Maintain a 2-3 inch layer of mulch around plants, keeping material away from plant stems to prevent pest and disease issues. Fresh mulch should be added regularly as organic materials decompose and contribute to soil improvement.
Organic mulches break down over time, adding valuable organic matter to your DIY garden beds while improving soil structure and fertility. This natural soil-building process reduces the need for synthetic amendments and creates a more sustainable growing system.
Seasonal Soil Management
Test your soil pH annually to ensure optimal growing conditions for your planned crops. Most vegetables prefer slightly acidic to neutral soil (pH 6.0-7.0), and the controlled environment of raised garden beds makes pH adjustment relatively simple.
Add compost or well-aged manure each spring to maintain soil fertility and organic matter content. The contained environment of raised bed gardening makes it easy to track and adjust soil amendments based on specific crop requirements.
Consider cover crops during off-seasons to prevent soil erosion and add organic matter to your DIY raised garden beds. Fast-growing crops like crimson clover or winter rye protect and improve soil during periods when main crops aren’t growing.
Troubleshooting Common Issues
Structural Problems
Address sagging or bowing sides promptly to prevent complete structural failure of your raised garden beds. Additional corner braces or center support posts can reinforce weakening frames and extend their useful life significantly.
Wood rot typically begins at ground contact points where moisture levels remain consistently high. Replace affected boards promptly and consider installing drainage improvements to prevent recurring problems in your DIY garden beds.
Loose corners result from the seasonal expansion and contraction of lumber materials. Retighten all fasteners annually and consider upgrading to longer screws or additional hardware if problems persist in your raised bed construction.
Drainage Issues
Poor drainage usually results from inadequate soil preparation or the use of heavy clay-based soil mixtures. Amend existing soil with coarse materials like perlite or coarse sand to improve drainage in affected raised garden beds.
Standing water indicates either inadequate drainage materials or blockages in the bed’s drainage system. Address drainage problems immediately to prevent root rot and other moisture-related plant health issues. Compacted soil develops over time as organic matter decomposes and foot traffic occurs. Add fresh compost and avoid walking on planted areas to maintain proper soil structure in your raised bed gardening system.
Pest and Disease Management
Monitor your DIY raised garden beds regularly for early signs of pest infestations or disease problems. The contained environment makes it easier to implement targeted treatments without affecting surrounding garden areas.
Implement crop rotation strategies to prevent soil-borne disease buildup in your raised garden beds. Move plant families to different beds each season to break disease cycles and maintain soil health. Encourage beneficial insects by including flowering plants in or near your raised bed gardening areas. These beneficial relationships provide natural pest control while supporting local pollinator populations.
Advanced Tips and Variations
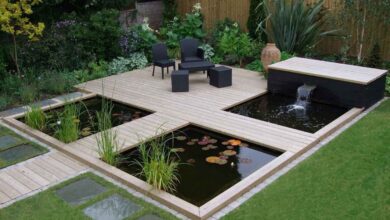
Multi-Level Raised Beds
Create terraced growing systems by building raised garden beds at different heights to accommodate sloped terrain or create visual interest in your garden design. Multiple levels also allow you to customize soil depth for different crop requirements within the same growing area.
Stepped bed designs make efficient use of vertical space while maintaining easy access for maintenance activities. This approach works particularly well for DIY garden beds in small spaces where ground area is limited but vertical space is available.
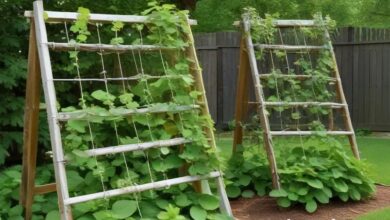
Consider incorporating built-in trellises or support structures into multi-level designs to maximize growing space for climbing crops. These integrated support systems eliminate the need for separate trellising while providing strong, permanent plant support.
Specialized Raised Bed Designs
Build custom raised garden beds with built-in storage compartments for tools, fertilizers, and other gardening supplies. These integrated storage solutions keep necessary materials close at hand while maintaining an organized garden workspace.
Create mobile DIY raised garden beds using casters or wheels to allow seasonal repositioning based on sun patterns or space requirements. Mobile beds work particularly well for renters or gardeners who may need to relocate their growing systems.
Design raised beds with integrated seating areas that provide comfortable resting spots while working in the garden. These multi-functional designs make raised bed gardening more enjoyable while maximizing the utility of available space.
Season Extension Techniques
Install removable covers or cold frames on your raised garden beds to extend the growing season and protect plants from extreme weather. The elevated design of raised beds makes it easier to install and remove protective structures as needed.
Consider heated beds for winter growing in cold climates. Solar-powered heating cables or passive solar designs can maintain soil temperatures that allow continued harvest throughout the winter months in properly constructed DIY raised garden beds.
Implement greenhouse attachments that transform standard raised garden beds into mini greenhouse systems during cold weather. These removable structures provide frost protection while maintaining easy access for maintenance and harvest activities.
More Read: A DIY Guide to Building Cucumber Trellises
Conclusion
Building DIY raised garden beds represents an excellent investment in your gardening future, providing years of productive growing space while improving both plant health and gardener comfort. The controlled growing environment, superior drainage, and customizable soil conditions make raised bed systems ideal for gardeners of all skill levels.
From material selection and construction techniques to soil preparation and ongoing maintenance, this comprehensive approach ensures your raised garden beds will provide abundant harvests for years to come. The versatility of raised bed construction allows for customization based on specific space requirements, crop preferences, and aesthetic goals, making this gardening method adaptable to virtually any growing situation.
Whether you’re a beginning gardener seeking to establish your first growing space or an experienced horticulturist looking to optimize your production methods, raised bed gardening offers the perfect combination of productivity, accessibility, and sustainability for modern home food production.