How to Extend Your Growing Season Into Fall and Winter
Learn how to extend your growing season with proven techniques. Discover cold frames, row covers, and winter gardening strategies for year.

Growing Season, the arrival of the first frost signals the end of productive gardening and the beginning of months spent dreaming about next spring’s garden. However, with the right techniques and knowledge, you can successfully grow well into fall and even throughout winter, enjoying fresh vegetables long after your neighbors have packed away their garden tools. Understanding how to extend your growing season transforms your garden from a seasonal hobby into a year-round source of nutritious, homegrown produce.
Season extension techniques have been practiced for centuries, from ancient Roman gardeners who grew cucumbers in wheeled carts they moved in and out of the sun, to modern farmers using sophisticated high tunnel systems. Today’s home gardeners can access proven methods that range from simple and inexpensive to more complex investments, all designed to protect plants from frost, wind, and cold temperatures while creating warmer microclimates that encourage continued growth.
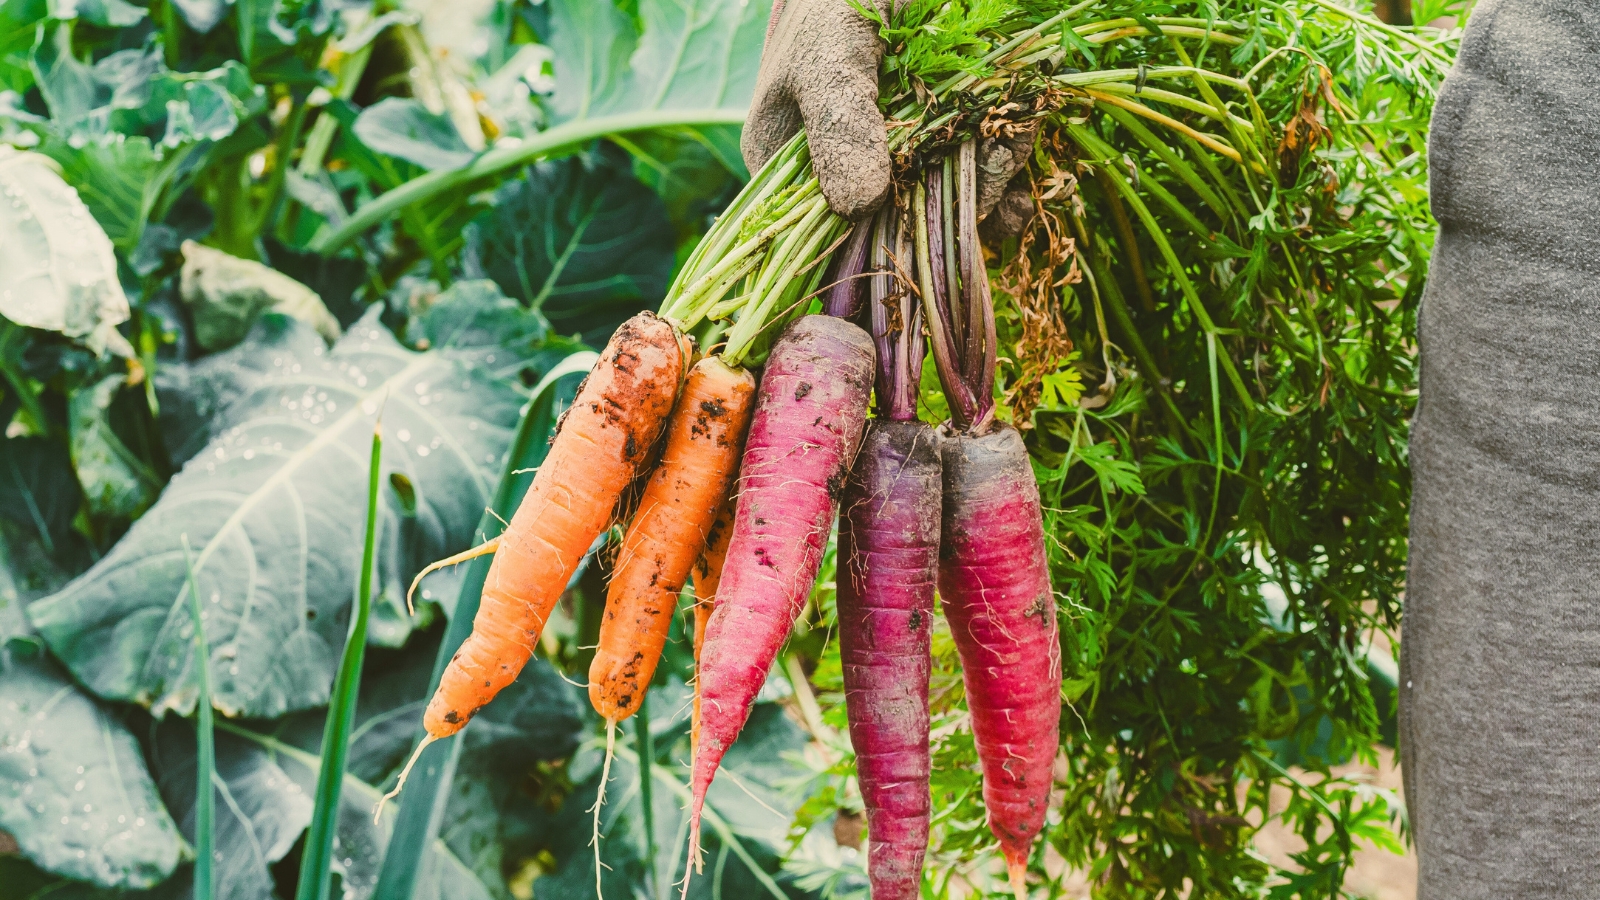
Extending the growing season offers numerous benefits beyond simply having fresh vegetables in December. Fall and winter gardening typically involves fewer pest problems, as most insects become dormant when temperatures drop. Disease pressure decreases significantly in cooler weather, reducing or eliminating the need for pesticides. Many vegetables develop enhanced flavor after exposure to light frosts—kale, Brussels sprouts, carrots, and parsnips actually become sweeter as plants convert starches to sugars to prevent cell freezing. Additionally, fall vegetable gardening fills the gap between summer’s harvest and spring’s renewal, providing continuous productivity from your garden space.
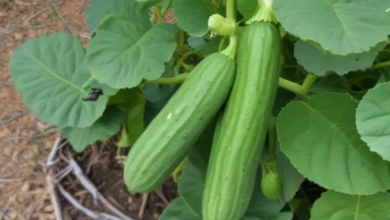
The key to successful season extension lies in understanding which crops thrive in cooler temperatures and which protection methods best suit your climate, budget, and gardening goals. Cool-season vegetables, including lettuce, spinach, kale, carrots, beets, and Asian greens, not only tolerate cold weather but actively prefer it, making them ideal candidates for fall and winter gardening. Properly protected, these crops continue producing fresh harvests even when outdoor temperatures drop below freezing.
This comprehensive guide explores proven season extension techniques suitable for gardens of all sizes and budgets. Whether you’re interested in simple solutions like row covers and cold frames, or ready to invest in more substantial structures like high tunnels, you’ll discover practical strategies for extending your harvest season. We’ll examine the science behind plant protection, discuss optimal crop selection for winter gardening, and provide detailed instructions for implementing various season extension methods. By the end of this article, you’ll possess the knowledge needed to transform your garden into a productive space that defies traditional seasonal limitations, providing fresh vegetables and extending your gardening pleasure throughout fall, winter, and into early spring.
Season Extension and Its Benefits
Season extension refers to techniques and structures that protect plants from adverse weather conditions, allowing gardeners to plant earlier in spring, harvest later in fall, a, nd in many climates, grow vegetables throughout winter. These methods create favorable microclimates around plants, moderating temperature extremes, blocking wind, and shielding crops from frost damage that would otherwise end the growing season.
The primary mechanism behind season extension techniques involves trapping solar heat during the day and retaining that warmth through cold nights. Even simple protective coverings can raise temperatures around plants by several degrees, es—often the difference between plant survival and frost death. Transparent materials like plastic or glass allow sunlight to penetrate while preventing warm air from escaping, creating a greenhouse effect on various scales.
Growing Season delivers multiple practical and economic benefits. Fresh, homegrown vegetables during fall and winter command premium prices at farmers’ markets, making season extension particularly attractive for market gardeners. Home gardeners enjoy significant grocery savings by harvesting their own produce year-round rather than purchasing expensive out-of-season vegetables. The extended productive period maximizes return on investment for garden infrastructure, seeds, amendments, and labor.
Beyond economics, fall and winter gardening offers superior growing conditions for many crops. Cooler temperatures and reduced pest pressure mean less time spent battling insects, diseases, and weeds. Many vegetables like kale and Brussels sprouts develop sweeter, more complex flavors after a touch of frost, as cold temperatures trigger plants to convert starches into sugars as a natural antifreeze mechanism. Carrots, parsnips, beets, and turnips harvested after frost exhibit enhanced sweetness and improved texture compared to summer-grown specimens.
Season extension also provides psychological and health benefits. Continuing to work in your garden through fall and winter maintains physical activity, provides fresh air and sunshine (on pleasant days), and offers the mental health benefits associated with gardening and nature connection. The satisfaction of harvesting fresh lettuce or spinach from under snow-covered row covers creates a sense of accomplishment and connection to food production that grocery store shopping simply cannot match.


Different season extension methods offer varying levels of protection and season lengthening. Simple floating row covers might add 2-4 weeks to your harvest season on both ends. Cold frames can extend the season by 4-8 weeks. Low tunnels provide 6-10 weeks of additional growing time. High tunnels or unheated greenhouses can enable year-round production in many climates, adding months to the effective growing season. Understanding your goals, climate, and budget helps determine which season extension techniques best suit your situation.
Selecting the Right Crops for Fall and Winter Gardening
Success in extending your growing season begins with choosing appropriate crops. Not all vegetables tolerate cold weather, and attempting to grow warm-season crops like tomatoes and peppers through winter in most climates results in disappointment. Cool-season vegetables, however, thrive in the moderate temperatures of fall and can survive surprisingly cold weather when properly protected.
Hardy Cool-Season Vegetables
The hardiest winter vegetables withstand repeated freezing and can survive unprotected in many climates or with minimal protection in colder regions. Kale tops the list of cold-hardy crops, surviving temperatures well below 20°F and actually improving in flavor after frost. Spinach tolerates temperatures down to 15-20°F, though growth slows significantly below 25°F. Collard greens, mustard greens, and turnip greens demonstrate excellent cold tolerance, continuing production through light freezes.
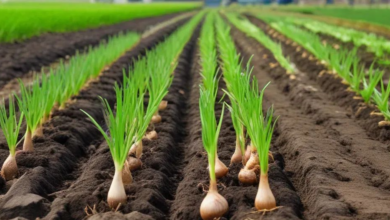
Root vegetables, including carrots, beets, turnips, radishes, parsnips, and rutabaga, can be left in the ground well into winter, with mulch providing additional protection. These crops often taste better when harvested after cold weather exposure. Leeks rank among the hardiest vegetables, withstanding severe cold and providing fresh harvests throughout winter in many climates. Brussels sprouts not only tolerate cold but also require frost exposure for optimal flavor development.
Mache (corn salad) represents one of the coldest-hardy salad greens, germinating and growing at temperatures that stop most other crops. Claytonia (miner’s lettuce) similarly tolerates extreme cold while providing fresh salad greens. These specialty greens excel in winter gardening applications and deserve wider recognition among home gardeners pursuing season extension.
Moderately Hardy Vegetables
Several popular vegetables tolerate moderate freezes (25-32°F) but require protection during hard freezes. Lettuce continues growing through fall with minimal protection, though mature plants withstand colder temperatures better than seedlings. Arugula, bok choy, pak choi, and other Asian greens produce abundantly in fall gardens and tolerate light frosts. Swiss chard survives light freezes and continues producing through much of winter with row cover or cold frame protection.
Broccoli and cauliflower mature in the fall and tolerate light frosts, though heads require protection from hard freezes. Cabbage demonstrates good cold tolerance, with mature heads surviving temperatures in the low 20s°F for brief periods. Kohlrabi grows well in the fall and tolerates light frosts. Peas can be planted in the fall for a very early spring harvest in mild climates or a late winter harvest when grown under protection.
Strategic Planting for Extended Harvests
Successful fall vegetable gardening requires proper timing. Calculate planting dates by working backward from your first expected frost date. Determine each crop’s days-to-maturity, add 14 days for the “fall factor” (slower growth in declining sunlight and temperatures), and count backward from the first frost date to find your ideal planting time.
For example, if your first frost typically occurs on October 15 and you want to grow lettuce (50 days to maturity), plant lettuce by August 12 (50 days + 14-day fall factor = 64 days before October 15). This ensures plants mature before growth essentially stops when day length drops below 10 hours, typically around mid-November in many regions.
Variety selection matters significantly for season extension. Choose cold-tolerant cultivars bred specifically for fall and winter production. Some lettuce varieties tolerate cold better than others. Certain spinach cultivars germinate and grow better in fall conditions. Seed catalogs typically identify varieties suitable for fall planting and winter gardening.
Row Covers: Affordable Season Extension for Every Garden
Row covers represent one of the most cost-effective and versatile season extension techniques available to home gardeners. These lightweight, synthetic fabrics laid over crops provide frost protection, wind shelter, and temperature moderation while allowing light, air, and moisture penetration. Row covers offer an accessible entry point into extending your growing season without significant investment or construction skills.
Row Cover Types and Protection Levels
Row covers come in various weights and thicknesses, each offering different levels of protection and light transmission. Lightweight row covers transmit 80-90% of available light but provide minimal frost protection, primarily serving as insect barriers during the main growing season. Medium-weight covers (0.55-0.9 oz. per square yard) protect crops to approximately 28°F and transmit 70-85% of light, making them ideal for fall season extension.
Heavy-weight row covers (1.25-2.0 oz. per square yard) provide the most substantial protection, protecting plants down to 24-28°F and transmitting 50-70% of available light. While heavy covers offer maximum frost protection, they block 40-50% of the sun’s light, interfering with plant growth during extended use. Heavy row covers are best for brief use at the beginning or end of the season when overnight freezes are possible.
The protective mechanism of row covers involves trapping heat radiated from the soil and creating an insulating air layer between the fabric and plant surfaces. This moderates temperature fluctuations and prevents frost formation on plant tissues. Row covers also block wind, reducing heat loss through evapotranspiration and preventing mechanical damage to plants.
Installation and Management
Proper row cover installation maximizes effectiveness. For “floating” applications, drape fabric directly over plants, securing edges with soil, sandbags, landscape pins, or rocks. As plants grow, the lightweight fabric rises with them. This method works excellently for low-growing crops like lettuce, spinach, and root vegetables. For taller plants or to prevent fabric contact with sensitive foliage, support row covers with wire hoops, PVC arches, or flexible metal conduit bent into semicircular shapes.
Support hoops should be spaced 4-6 feet apart along the row, with fabric draped over the framework and secured at ground level. This creates a protective tunnel that sheds rain and snow while maintaining an air gap that provides additional insulation. Ensure row covers are secured thoroughly—wind can quickly tear or blow away improperly anchored fabric.
Ventilation management proves crucial for row cover success. On sunny days, even in fall and winter, temperatures under row covers can climb to damaging levels. Row covers can be removed when sunny and ambient temperatures are above 55°F for cool-season crops, though they may need replacement during cold nights. Many gardeners leave medium-weight covers on continuously during fall, relying on the fabric’s breathability to prevent overheating, but check plants regularly for signs of heat stress.
Row covers require minimal maintenance but benefit from periodic inspection. Check for tears or damage from wind, animals, or garden equipment. Ensure edges remain secured and fabric stays properly positioned. At season’s end, remove covers, wash thoroughly to remove soil and debris, dry completely, and store in a protected location. Properly maintained row covers last multiple seasons, making them an economical season extension investment.
Strategic Applications for Maximum Benefit
Row covers excel in several season extension scenarios. In early fall, use them to protect summer crops like tomatoes, peppers, and squash from first light frosts, often extending harvest by 2-4 weeks. Apply medium-weight covers over fall-planted greens, brassicas, and root vegetables as temperatures decline, maintaining active growth weeks longer than unprotected crops.
Layering row covers increases protection—a medium-weight cover plus a heavy-weight cover provides significantly more frost protection than either alone, potentially keeping plants alive through temperatures in the low teens or single digits Fahrenheit. For maximum protection, place row covers over low tunnels covered with greenhouse plastic, creating a multi-layered system that extends the season dramatically.
Cold Frames: Miniature Greenhouses for Year-Round Growing
Cold frames rank among the oldest and most reliable season extension methods, dating back centuries in European gardens. These simple, bottomless boxes with transparent tops create miniature greenhouses that capture solar heat while protecting plants from wind, frost, and precipitation. Cold frames enable winter gardening even in harsh climates and provide an excellent return on investment for space-conscious gardeners.
Cold Frame Design and Construction
A basic cold frame consists of four walls forming a shallow box, typically 12-18 inches high at the back and 8-12 inches at the front, creating a sloped surface. The angled top faces south (in the Northern Hemisphere) to maximize solar gain. Traditional cold frames used old window sashes as transparent covers, but modern versions employ polycarbonate panels, acrylic sheets, or corrugated plastic—all more durable and safer than glass.
The frame itself can be constructed from various materials. Untreated lumber (cedar, redwood, or pressure-treated lumber rated for ground contact) provides good insulation and ease of construction. Repurpose scrap lumber and old window sashes as cold frame construction materials for economical builds. Concrete blocks, bricks, or stone create permanent cold frames with excellent thermal mass that stores daytime heat and releases it at night. Straw bales provide temporary cold frames with superior insulation.
Size depends on available space and ambition. A 3×6-foot cold frame accommodates substantial plantings while remaining manageable. Smaller frames (2×4 feet) work for limited spaces. Build multiple small frames rather than one large structure for flexibility and mobility. Ensure the lid opens fully for easy access and ventilation. The lid should close snugly to keep warm air from leaking out, but must be on a hinge so that you can vent the cold frame during the day.
Operating and Managing Cold Frames
Successful cold frame operation requires attentive temperature management. On sunny days, even in winter, temperatures inside closed frames can soar to 80-100°F—high enough to damage or kill plants. Keep a thermometer in the cold frame to help monitor temperatures. Vent the frame when daytime temperatures go above 50°F for cool-season crops. Close it back up when temperatures drop below 45°F.
Manual venting requires daily attention, challenging for gardeners with work or travel commitments. Solar-powered automatic vent openers that automatically open and close the lid as temperatures dictate solve this problem, eliminating concerns about plants overheating when you’re unavailable. These devices, available at garden supply stores, contain wax-filled cylinders that expand when warm and contract when cool, mechanically opening and closing the vent without electricity.
Cold frame positioning significantly impacts performance. South-facing locations (in the Northern Hemisphere) receive maximum winter sunlight. Placing frames against south-facing walls of buildings provides additional warmth from heat radiating from the structure. Avoid low spots where cold air accumulates. Ensure good drainage so frames don’t fill with water during rain or snowmelt.
During extreme cold, provide additional protection by covering cold frames with blankets, tarps, or straw bales at night. The extra insulation can make the difference between plant survival and loss during hard freezes. Remove insulation during the day to allow solar heating.
Planting Strategies for Cold Frames
Cold frames accommodate multiple planting strategies. Direct-seed cool-hardy crops like lettuce, spinach, arugula, and Asian greens in late summer or early fall. These mature before deep winter, then provide harvests throughout cold months. Plant transplants of cold-hardy brassicas like kale, collards, and cabbage for continuous harvests. Succession plant lettuce and spinach every 2-3 weeks through fall for staggered harvests.
Cold frames are great for extending the growing season of all cool-season leafy crops. Focus on cut-and-come-again varieties of lettuce, spinach, and Asian greens that allow multiple harvests from the same plant. Root vegetables can be grown in cold frames, though deeper frames (18-24 inches) accommodate longer-rooted crops like carrots and parsnips better.
Use cold frames in spring for starting transplants weeks before outdoor planting is possible. Transplant seedlings of tomatoes, peppers, and other warm-season crops into cold frames in late winter or early spring, hardening them off gradually before moving to the garden. This advances transplanting dates significantly compared to starting indoors.
Low Tunnels: Portable Protection for Garden Beds
Low tunnels provide an intermediate level of season extension between row covers and high tunnels, offering better protection than simple fabric coverings while remaining more affordable and manageable than large structures. Low tunnels are temporary structures approximately 4 feet tall and 3-6 feet wide, constructed of wire or plastic hoops supporting transparent plastic or row cover fabric.
Low Tunnel Construction and Materials
Building low tunnels requires minimal materials and skills. Hoops constructed of wire (9-gauge) or pipe (metal or plastic) support row cover fabric or polyethylene plastic. Ten-foot lengths of half-inch electrical conduit or PVC pipe, bent into semicircular arches, create sturdy hoops suitable for most garden applications. Wire cattle panel sections can be bent into arched supports for very strong low tunnels.
Metal hoops are bent into a half circle using a hoop bender to ensure they are identical, though you can bend hoops manually over a form or purchase pre-bent hoops. Hoops are placed 5-6 inches directly into the ground, spaced 5 feet apart in a row. For added stability, especially in windy locations, connect hoops with a horizontal “spine” or “purlin” running along the top, secured with zip ties or specialized clips.
Cover low tunnels with 4-mil or 6-mil greenhouse-grade plastic for maximum heat retention and weather protection. During warmer weather, row cover fabric can be used alone, while during colder temperatures, a layer of 4-mil or 6-mil plastic is placed over row cover and secured to maximize insulation. Secure covering materials with spring clamps, specialized low tunnel clips, sandbags, or by burying edges in soil trenches.
Managing Low Tunnel Environments
Temperature and ventilation management determine low tunnel success. Like cold frames, low tunnels can overheat rapidly on sunny days. On warmer, sunny days, the plastic needs to be lifted to allow ventilation to avoid plants becoming overheated. Raise tunnel sides by rolling up plastic and securing with clips attached to hoops, or remove plastic entirely on warm days.
Low tunnels protect crops from low temperature injury and offer wind protection during winter, raising average daily temperature and creating protected environments. They provide a 4-10°F temperature increase inside compared to outside, often sufficient to prevent frost damage during fall’s first freezes or winter’s moderate cold spells. During severe cold, add row cover fabric under plastic covering, layer additional row cover over plastic, or add insulating blankets at night.
Moisture management differs from outdoor growing. Plastic causes moisture build-up inside the tunnel; therefore, use only as needed during the coldest weather. During moderate weather, row cover fabric alone provides adequate protection while allowing better air exchange and moisture management. Monitor soil moisture regularly—plastic coverings reduce precipitation reaching plants, necessitating supplemental irrigation even during rainy periods.
Low tunnels work excellently for season extension at both ends of the traditional growing season. In spring, install tunnels over early plantings 2-4 weeks before the last frost date, warming soil and protecting tender transplants. In fall, place tunnels over cool-season crops as temperatures decline, extending harvests 6-8 weeks or more beyond outdoor plantings.
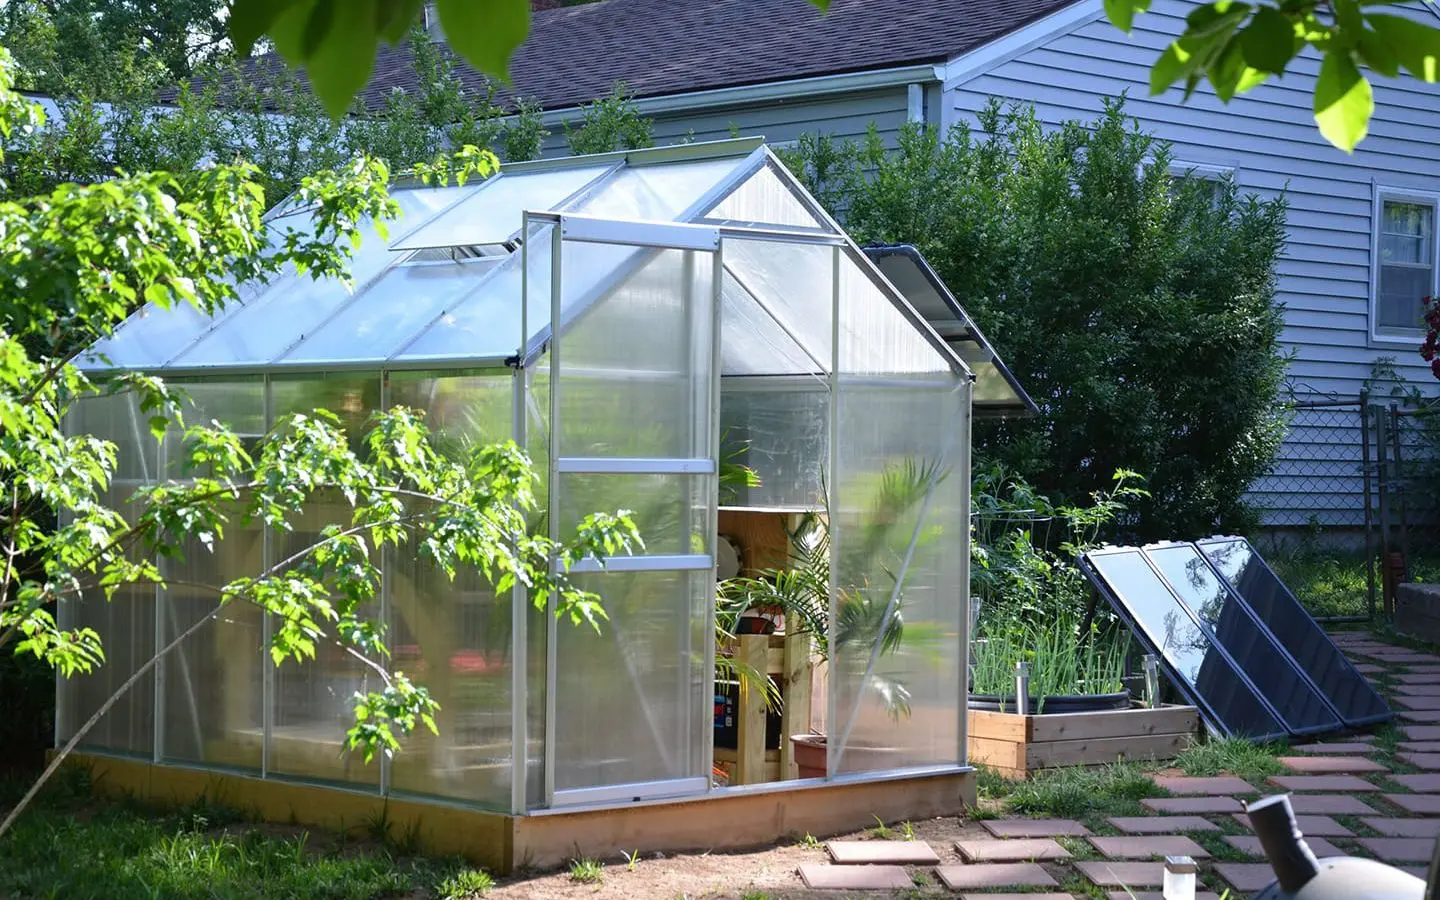
High Tunnels: Serious Season Extension Infrastructure
High tunnels (also called hoop houses or caterpillar tunnels) represent substantial investments but provide dramatic season extension capabilities. High tunnels are tall enough to stand inside and often large enough to accommodate walk-behind tillers or even small tractors, consisting of metal or plastic ribs with greenhouse plastic stretched over them.
High Tunnel Systems
High tunnels differ from greenhouses primarily in environmental control sophistication. While greenhouses typically include heating systems, automated ventilation, electricity, and sometimes supplemental lighting, high tunnels rely on passive solar heating and manual or simple automatic ventilation. This reduced complexity translates to lower initial costs and operating expenses while still providing substantial environmental protection.
High tunnels add approximately a month to the growing season in early spring and late autumn without additional measures, especially when growing warm-season crops. However, committed growers achieve much more dramatic results. Some grow certain cool-season crops through winter by combining multiple techniques, such as using floating row covers or low tunnels inside high tunnels to provide layered protection, maintaining adequate temperatures even during severe cold.
Typical high tunnel dimensions range from 12-30 feet wide and 24-96 feet long, providing 300-2,500 square feet of protected growing space. Smaller tunnels may be Quonset-shaped (half-circle frame) while larger tunnels are Gothic-shaped (peaked frame). Gothic frames shed snow well, an important consideration in snowy climates. Both designs benefit from internal bracing for wind and snow load resistance.
High Tunnel Construction and Costs
Building a high tunnel requires more investment than simpler season extension methods. Commercial kits range from $1.50-$3.00 per square foot for basic models to $4.00-$8.00 per square foot for heavy-duty structures with upgrades. A 20×48-foot tunnel (960 square feet) might cost $1,500-$4,000, including materials and labor. While substantial, this investment often pays for itself within 2-3 seasons through extended production and premium pricing.
DIY construction using purchased plans and locally-sourced materials can reduce costs significantly. However, proper engineering matters—high tunnels must withstand wind, snow, and weather extremes. Many university Extension services provide detailed construction plans designed for local climate conditions. These plans typically include materials lists, assembly instructions, and engineering specifications, ensuring structures meet wind and snow loads.
Frame materials include galvanized steel pipe (most durable but expensive), EMT electrical conduit (economical but lighter-duty), or specialty-extruded aluminum or steel tubing. Covering material consists of 6-mil greenhouse-grade polyethylene plastic, typically lasting 4-6 years before requiring replacement. UV-treated plastic rated specifically for agricultural use dramatically outlasts generic plastic sheeting.
Ground anchoring provides structural stability. Posts can be driven directly into soil, secured in concrete footings, or attached to ground plates or auger-style earth anchors. Local building codes may require permits and inspections for larger structures. Check requirements before construction to avoid compliance issues.
Operating and Optimizing High Tunnels
Successful high tunnel operation requires active management. Ventilation presents the primary challenge—temperatures can exceed 100°F on sunny days even in winter. Manual ventilation involves rolling up the side walls and opening the end doors. Automated ventilation systems with fans and temperature-sensitive controls reduce management demands but add cost and require electricity.
Many growers use manual side-wall crank systems, allowing sides to roll up and down easily. On hot days, fully open sides and ends for maximum airflow. During cold nights, lower sides and closed ends are used to retain heat. Partial opening provides fine-tuned temperature control. Monitor internal temperatures with min-max thermometers to understand daily temperature fluctuations and adjust ventilation strategies.
High tunnels planted directly into the ground benefit from the soil’s thermal mass, which moderates temperature swings. Raised beds inside tunnels warm faster in spring, advancing planting dates, but may require more frequent irrigation. Drip irrigation systems work excellently in high tunnels, minimizing disease pressure by keeping foliage dry while providing consistent moisture.
Combine high tunnels with supplementary season extension techniques for maximum performance. Install low tunnels or row covers over crops during the coldest weather, adding 5-10°F additional protection. Use black plastic mulch or landscape fabric to warm the soil and suppress weeds. Strategic crop selection and succession planting maintain continuous productivity throughout extended seasons.
Additional Season Extension Techniques
Beyond primary season extension structures, several supplementary techniques enhance protection and extend harvest windows further.
Mulching for Root Crop Storage
Heavy mulching allows root vegetables to remain in the ground throughout winter in many climates. Mulch root crops for an extended harvest in cold winter areas by applying 12-18 inches of straw, shredded leaves, or hay over beds after the ground begins freezing. This mulch layer insulates soil, preventing deep freezing that makes harvesting impossible. Harvest carrots, beets, parsnips, and turnips as needed throughout winter by pushing aside mulch and digging roots.
Wall O’ Water and Cloches
Individual plant protectors provide targeted protection for high-value plants. Wall O’ Water devices surround individual plants with water-filled tubes that absorb daytime heat and release it at night, creating a warm microclimate protecting plants from frost. These work excellently for advancing tomato and pepper transplanting dates by 2-4 weeks.
Traditional cloches (glass or plastic bells placed over plants) and modern alternatives like cut-off milk jugs or commercial plant protectors shield individual plants from frost and cold wind. While labor-intensive for large plantings, cloches effectively protect high-value or limited plants.
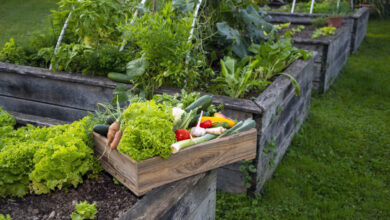
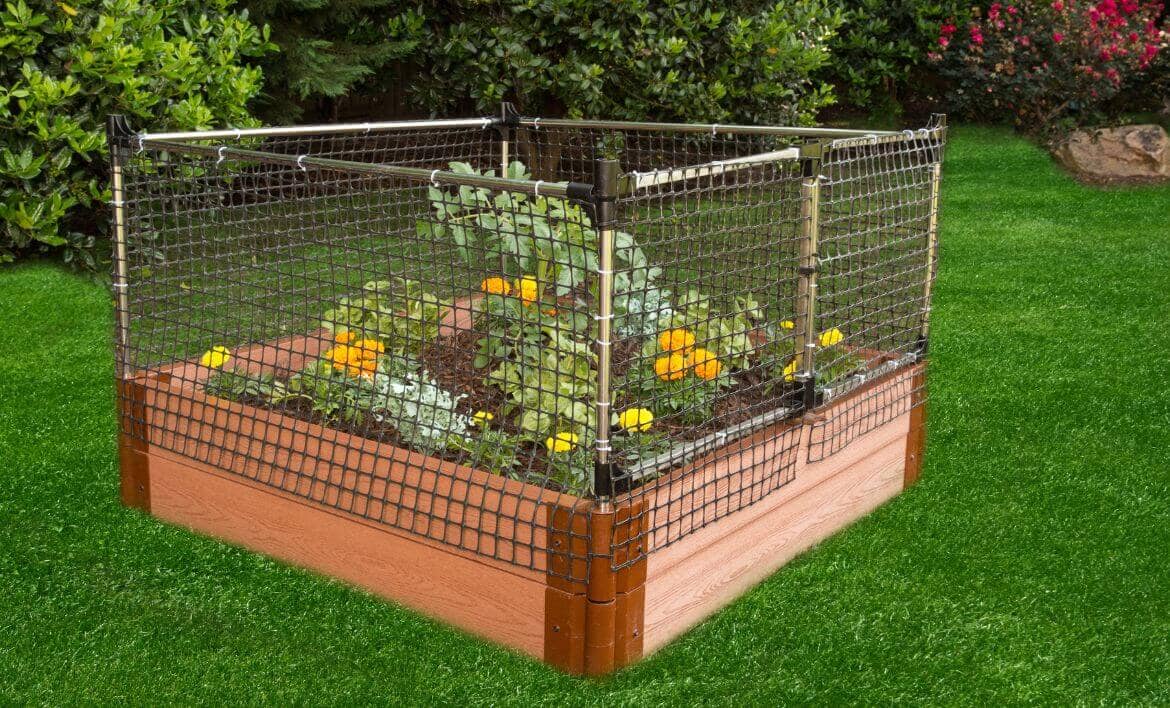
Raised Beds
Raised beds warm faster in spring than ground-level gardens due to increased sun exposure and improved drainage. This can advance planting dates by 1-2 weeks. In the fall, raised beds often remain warmer longer, extending harvests. Combining raised beds with other season extension techniques like row covers or cold frames compounds benefits, significantly extending productive periods.
Strategic Garden Placement
Site selection impacts season extension success significantly. South-facing slopes (Northern Hemisphere) receive maximum solar exposure, warming earlier in spring and maintaining warmth longer in fall. Gardens against south-facing walls benefit from the reflected heat and thermal mass of structures. Avoid frost pockets in low-lying areas where cold air settles. Windbreaks protect plants from heat loss and physical damage, improving microclimate conditions.
Timing Your Fall and Winter Plantings
Proper timing determines fall vegetable gardening success. Unlike spring planting, where you plant as soon as conditions allow and crops mature during lengthening, warming days, fall planting requires precision—plants must reach maturity before day length and temperatures decline sufficiently to halt growth.
Understanding frost dates and working backward from the first frost date helps determine when to start fall seedlings or direct sow seeds. Calculate planting dates using this formula: Days to maturity + 14-day Fall Factor + harvest window = days before first frost to plant. The “Fall Factor” accounts for slower growth as temperatures cool and day length shortens.
For example, planning to grow lettuce (55 days to maturity) with harvest continuing 3 weeks after maturity, and a first frost date of October 15: 55 + 14 + 21 = 90 days before October 15 = plant by July 17. This ensures plants mature and provide extended harvests before conditions halt growth.
After day length dips below 10 hours (usually around mid-November in many regions), plants won’t grow much until February, but they can overwinter in the garden with protection, offering harvests even during the coldest months. This “Persephone Period” (named after the Greek goddess associated with winter) sees plants enter semi-dormancy, neither growing significantly nor dying. Properly protected, these dormant plants resume growth when day length increases and provide very early spring harvests.
Plan succession plantings of quick-maturing crops (lettuce, radishes, spinach, Asian greens) every 2-3 weeks from mid-summer through early fall. This provides continuous harvests through fall and into winter, maximizing productivity from limited space. Slower crops like cabbage, broccoli, and Brussels sprouts typically receive single fall plantings timed to mature in late fall or early winter.
Also Read: The Ultimate Guide to Growing Lettuce Indoors Year-Round
Conclusion
Successfully Growing Season into fall and winter transforms your garden from a seasonal activity into a year-round source of fresh, nutritious produce while maximizing the return on your gardening investment. By implementing appropriate season extension techniques—whether simple row covers, practical cold frames and low tunnels, or comprehensive high tunnel systems—you can continue harvesting vegetables long after traditional gardening seasons end. The key lies in understanding your climate, selecting cold-hardy crops appropriate for fall and winter gardening, timing plantings correctly, and choosing season extension methods that match your budget, space, and ambition. With proper planning and the techniques described in this guide, you’ll discover that frost need not signal the end of fresh garden harvests, but rather an opportunity to enjoy some of the season’s most flavorful vegetables while developing skills that make you a more accomplished, confident gardener capable of producing food throughout the entire year, regardless of climate challenges.