Growing Microgreens at Home Beginner’s Guide to Indoor Superfood
Learn how grow microgreens at home with our complete beginner's guide. Discover simple steps, best seeds, and health benefits of these nutrient.
Growing microgreens at home has become one of the most rewarding and accessible ways to cultivate fresh, nutrient-dense greens in your kitchen. Unlike traditional gardening, which requires extensive outdoor space, equipment, and months of patience, indoor microgreen growing delivers remarkable results in just 7 to 21 days. Whether you live in a bustling urban apartment, a suburban home, or anywhere space is limited, these tiny yet mighty plants flourish indoors on a simple windowsill or under basic lighting systems.
Microgreens, often called “vegetable confetti” or micro herbs, are young seedlings of vegetables and herbs harvested at their optimal nutritional peak—typically when they reach 1 to 3 inches in height. At this tender stage, these nutritious micro plants contain concentrations of vitamins, minerals, and antioxidants that are 4 to 40 times more potent than their fully mature counterparts. This extraordinary nutrient density is why health professionals, chefs, and nutrition enthusiasts have embraced microgreens as a superfood for modern living.
The beauty of how to grow microgreens lies in its simplicity and accessibility. You don’t need expensive equipment, horticultural expertise, or a magical green thumb. With just a shallow container, quality seeds, potting soil, and basic knowledge, anyone can transform their kitchen into a thriving microgreens growing space. The rapid growth cycle means you can harvest fresh, pesticide-free greens continuously throughout the year, regardless of external weather conditions. Beyond their impressive nutritional profile, homegrown microgreens offer exceptional cost savings—producing fresh greens for mere pennies compared to the $4 to $6 per container you’d pay at specialty grocery stores or upscale restaurants.
This comprehensive beginner’s guide explores everything you need to know about indoor superfood cultivation, from selecting the best microgreen seed varieties to optimizing growing conditions and harvesting techniques. Whether your goal is to boost your family’s nutrition, explore urban gardening, or create a sustainable food source, growing microgreens indoors represents an investment in both your health and your home environment.
What Are Microgreens? Your Indoor Superfood
Microgreens represent the seedling stage of common vegetables, herbs, and even some grains, harvested before they mature into full-sized plants. This distinction is crucial because microgreens differ from sprouts in several important ways. While sprouts are germinated seeds grown entirely in water and consumed whole, including roots and seed coat, microgreen plants are cultivated in soil or growing media and harvested for their tender stems and leaves after approximately 1 to 3 weeks of growth.
The nutritional transformation that occurs during this rapid development period is nothing short of remarkable. Microgreen nutritional value far exceeds that of mature vegetables because all the plant’s energy concentrates in producing these first vital leaves. A single ounce of broccoli microgreens contains the nutritional equivalent of an entire 1.5-pound crown of mature broccoli. This concentrated nutrient profile makes microgreens nutrient-dense additions to any diet, providing essential vitamins including C, E, K, and A, along with minerals like potassium, iron, magnesium, zinc, and copper.
The immature true leaves and developing cotyledons of microgreen seedlings offer another advantage: they’re tender enough to eat raw, which preserves their heat-sensitive vitamins and phytonutrients. This raw consumption capability distinguishes microgreens from baby greens, which require cooking and handling similar to mature vegetables.
Essential Supplies: Setting Up Your Microgreens Growing System
Creating the ideal microgreens growing environment requires minimal equipment, making this indoor superfood project accessible to anyone. Each component of your microgreen growing setup ensures successful harvests while keeping costs remarkably low.
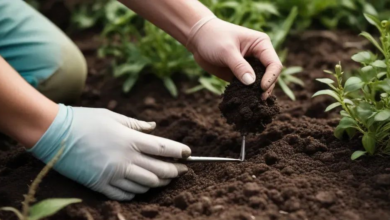
- Growing Containers and Trays: The foundation of your microgreens indoor garden begins with appropriate containers. Shallow trays or seed trays work perfectly, as microgreens only need 1 to 2 inches of growing medium depth. Recycled plastic containers, pie pans, or purpose-built microgreen trays all function effectively. For optimal drainage, stack a perforated tray inside a solid tray—the top tray holds soil while the bottom tray catches excess water. This setup prevents root rot while maintaining consistent moisture levels.
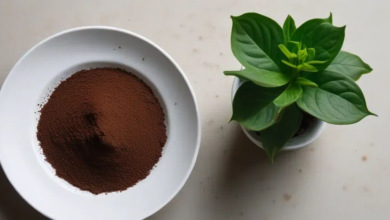
- Growing Medium Options: Your choice of microgreen growing medium significantly impacts success rates. Potting soil, specifically formulated for seed starting, remains the most popular option. Alternatively, soil-less growing media like coconut coir, peat moss, or specialized microgreen growing mats work exceptionally well. Growing mats made from natural fibers or synthetic materials combat mold and fungal issues common in dense plantings. These materials are environmentally sustainable, retain adequate moisture, and provide proper root structure development.
- Quality Seeds: Selecting microgreen seeds requires attention to seed quality and treatment status. Purchase untreated microgreen seeds specifically labeled for consumption, as garden seeds sometimes receive fungicide coatings unsuitable for eating. Beginner microgreen varieties like broccoli microgreens, pea shoots, radish microgreens, and sunflower shoots germinate reliably and rarely disappoint new growers. Avoid treated seeds at all costs.
- Lighting Systems: While microgreens can grow on a sunny windowsill receiving 6+ hours of direct sunlight, grow lights for microgreens provide consistent, reliable results year-round. LED microgreen grow lights positioned 3 to 5 inches above your plants deliver the optimal light spectrum for 12 to 16 hours daily. This investment transforms your indoor microgreen production from seasonal to year-round capability.
- Additional Essential Tools: A spray bottle for microgreens maintains proper moisture during germination without waterlogging. A kitchen scale accurately measures seed quantities per tray. Sharp scissors or pruning shears ensure clean harvests. Optional items like humidity domes accelerate germination, while small colanders help rinse larger seeds before planting.
Selecting the Best Microgreen Varieties for Beginners
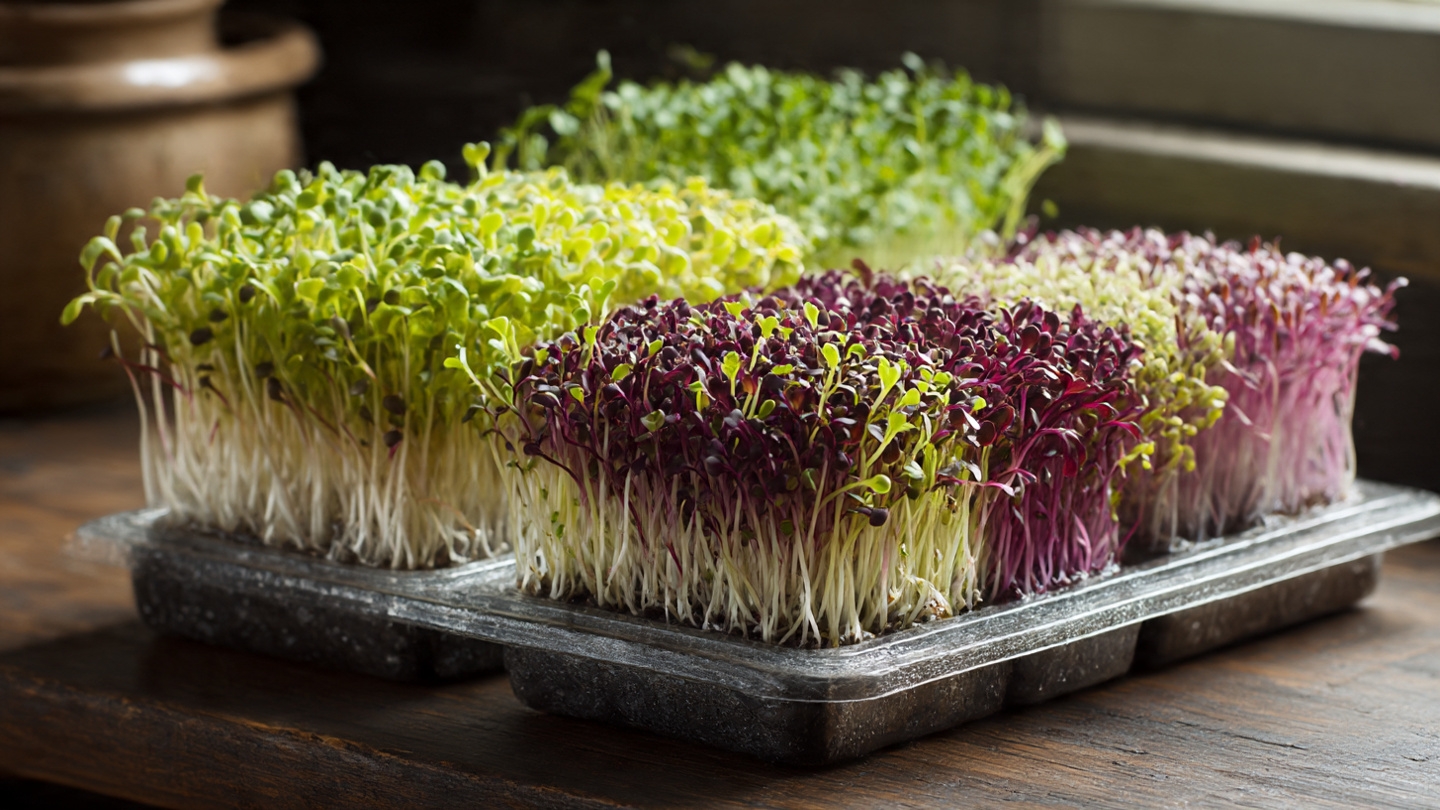
Choosing appropriate microgreen varieties for beginners dramatically increases your success rate and enjoyment. Different types of microgreens offer unique flavors, textures, and nutritional profiles, so each helps guide your selections.


- Broccoli Microgreens: Among the most popular microgreens to grow, broccoli microgreens nutrition includes exceptional levels of sulforaphane, a compound showing promise in cancer prevention and anti-inflammatory applications. These easy-to-grow microgreens have mild flavor, an attractive green appearance, and germinate reliably within 2 to 3 days. Most growers harvest broccoli microgreens within 10 to 12 days.
- Pea Shoots: Pea microgreens, also called pea shoots, deliver a sweet, delicious flavor that children eagerly eat. These nutritious pea shoots contain substantial vitamin C and folate, and their sturdy nature makes them forgiving for beginners. Pre-soaking dried peas for 4 to 6 hours before planting accelerates germination, resulting in harvests within 10 to 14 days.
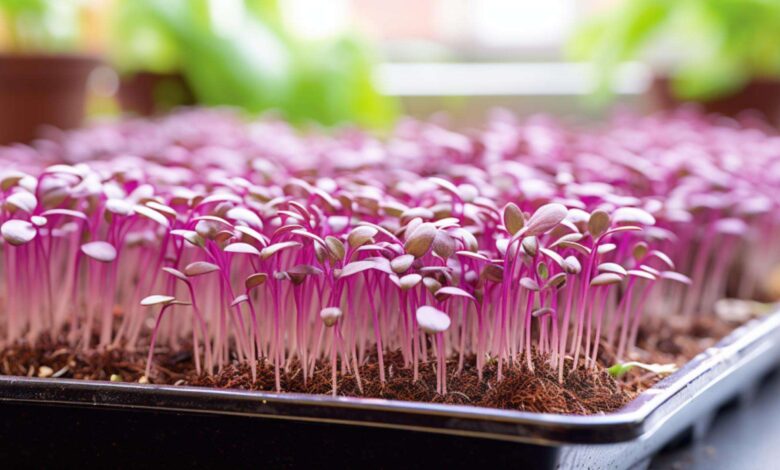
- Radish Microgreens: If you prefer bold flavor, radish microgreens deliver spicy, peppery taste in remarkably quick timeframes. Fast-growing radish shoots mature in as little as 4 days, making them exciting for impatient gardeners. The spicy radish microgreen flavor adds distinctive character to salads, sandwiches, and Asian dishes.
- Sunflower Shoots: Sunflower microgreens provide a delicious, nutty flavor and satisfying crunch. Sunflower shoots nutrition includes beneficial vitamins and minerals, while their larger seed size and robust growth make them beginner-friendly. These crunchy microgreens typically reach harvest size within 10 to 12 days.
- Other Excellent Choices: Mustard microgreens, kale microgreens, arugula microgreens, cabbage microgreens, and chia microgreens all merit consideration for different flavor profiles and nutritional emphasis.
Step-by-Step Guide: How to Grow Microgreens at Home
Learning how to grow microgreens involves following straightforward steps that produce reliable results. This microgreens growing process takes approximately two to three weeks from seed to harvest.
Step 1: Prepare Your Growing Containers
Fill your selected container with 1 to 2 inches of moistened potting soil or growing medium. Gently tamp the soil with a flat object to create a firm, even surface for seed placement. Water thoroughly until moisture reaches the bottom tray, then allow excess to drain. This initial watering ensures uniform moisture distribution throughout the growing medium for microgreens, preventing dry spots that compromise germination.
Step 2: Sow Your Seeds
Scatter microgreen seeds evenly across the prepared soil surface, aiming for dense but not overlapping coverage. Larger seeds like pea and sunflower seeds benefit from 4 to 6 hours of pre-soaking to soften seed coats and accelerate germination. Gently press seeds into contact with soil using your fingertips, then cover the tray with a dome or plastic covering to maintain humidity during the germination phase.
Step 3: Manage the Germination Phase (Blackout Period)
During the first 2 to 4 days, keep your seed tray covered in darkness to mimic natural soil conditions. Check daily and mist with water only if the surface appears dry. This blackout period for microgreens encourages germination without promoting premature sprouting. The tray lid traps moisture, typically eliminating the need for daily watering during this critical phase.
Step 4: Provide Light for Vegetative Growth
Once seeds sprout and develop their first leaves, typically after 3 to 5 days, remove the cover and introduce light. Position microgreen grow lights or place trays on a sunny windowsill receiving a minimum of 6 hours of direct light daily. Maintain 12 to 16 hours of daily illumination for robust growth. Adequate light prevents microgreens from becoming leggy or pale.
Step 5: Water Appropriately During Growth
After removing the cover, watering microgreens transitions from misting to more intentional hydration. Bottom watering works effectively: pour water into the lower solid tray, allowing soil to absorb moisture from beneath. This watering system for microgreens prevents wet foliage, which encourages mold and fungal issues. Different varieties have varying water requirements—water-hungry varieties like pea microgreens need more consistent moisture than delicate amaranth microgreens.
Step 6: Harvest Your Fresh Microgreens
When to harvest microgreens varies by variety, but generally occurs when plants reach 1 to 3 inches tall and display their first true leaves beyond the initial seed leaves. Using sharp scissors, cut microgreens just above soil level, leaving roots and soil undisturbed. Freshly harvested microgreens taste best immediately, but store in sealed containers within refrigerators for up to 5 to 7 days.
Optimizing Your Indoor Microgreens Growing Conditions
Success with indoor microgreens depends on maintaining ideal growing conditions for microgreens throughout the cultivation cycle. Environmental factors transform your microgreen growing space into a productive system.
- Temperature and Humidity: Optimal microgreens temperature ranges from 68 to 72 degrees Fahrenheit. Avoid placing trays near HVAC vents or drafty windows, as temperature fluctuations stress developing plants. Ideal humidity for microgreens falls below 50%, helping prevent mold on microgreens—a common problem in excessively moist environments. Good air circulation addresses this issue effectively.
- Air Flow and Ventilation: Gentle air movement strengthens microgreen seedling stems and reduces fungal problems. After removing the germination cover, position a small fan nearby to create subtle air movement without violently drying your plants.
- Controlling Mold and Pathogens: Mold prevention for microgreens begins with sanitation. Sterilize all containers before use, use fresh growing medium for each crop, and never reuse old soil. If mold appears on microgreens, immediately remove affected areas and improve air circulation. Optional mold-inhibiting solutions like diluted hydrogen peroxide or baking soda sprays help prevent issues.
- Composting Used Growing Medium: After harvest, compost your spent microgreens soil responsibly. This sustainable practice reduces waste while creating nutrient-rich material for future garden projects.
The Remarkable Health Benefits of Microgreens
- health benefits motivate consistent cultivation and consumption. These nutritious microgreens deliver impressive physiological advantages beyond basic nutrition.
- Exceptional Nutrient Concentration: Microgreens vitamin content reaches exceptional levels—studies confirm microgreens contain 4 to 40 times more nutrients than mature counterparts. This extraordinary nutrient density of microgreens results from harvesting at peak physiological development.
- Cardiovascular and Metabolic Support: Microgreens for heart health contain abundant fiber, potassium, and bioactive compounds supporting healthy blood pressure and cholesterol levels. Red cabbage microgreens specifically demonstrate cholesterol-lowering properties in clinical research.
- Antioxidant and Anti-inflammatory Power: Microgreens’ antioxidant content combats oxidative stress linked to chronic disease development. Polyphenol-rich microgreens like Brassica varieties contain over 164 unique antioxidant types.
- Cellular Protection: Sulforaphane in microgreens, particularly abundant in cruciferous microgreens like broccoli and cabbage, supports cellular detoxification and potentially reduces cancer risk.
- Weight Management Support: Microgreens for weight management provide nutrition without significant calories—an ounce of kale microgreens contains only 29 calories while delivering substantial vitamins and minerals.
- Digestive Health: Microgreens fiber content supports beneficial gut bacteria, promoting healthy digestion and nutrient absorption.
Common Challenges and Troubleshooting Your Microgreens Setup

Even experienced growers encounter microgreens growing problems. Knowing how to address issues with microgreens ensures consistent success.
- Problem: Poor Germination
- Causes: Old or low-quality microgreen seeds, incorrect moisture levels, or inadequate warmth typically prevent germination. Solution: Verify seed freshness, pre-soak larger seeds, and maintain 68 to 72-degree temperatures.
- Problem: Leggy or Pale Growth
- Causes: Insufficient light is the primary culprit. Solution: Increase light duration for microgreens to 14 to 16 hours daily or position grow lights for microgreens closer to the plants.
- Problem: Mold Development
- Causes: Excessive moisture, poor air circulation, or reused contaminated soil create mold problems on microgreens. Solution: Reduce watering frequency, improve ventilation, use fresh growing medium, and sanitize all equipment.
Problem: Slow Growth
- Causes: Low temperatures, insufficient light, or weak seeds slow development. Solution: Maintain proper temperature range, ensure adequate illumination, and source quality microgreen seeds from reliable suppliers.
- Problem: Algae Growth
- Causes: Excessive light and moisture encourage algae. Solution: Maintain appropriate moisture levels and reduce light exposure on the soil surface.
Harvesting, Storage, and Using Your Fresh Microgreens
- Harvesting microgreens properly ensures peak quality and allows regeneration or replanting. Fresh microgreens deliver maximum nutritional value and superior flavor compared to store-bought alternatives.
- Optimal Harvest Timing: When to harvest microgreens depends on plant development stages. Cut when plants display two or more true leaves beyond the initial seed leaves, typically at 1 to 3 inches in height. This timing captures peak microgreens nutrition while maintaining tender texture.
- Harvesting Technique: Using sharp scissors or a microgreens knife, cut plants just above soil level. Clean, quick cuts prevent crushing delicate stems, which degrades quality. Freshly harvested microgreens contain maximum enzyme activity and nutritional value.
- Storage Methods: Fresh microgreens stored in sealed containers within refrigerator salad compartments maintain quality for 5 to 7 days. Store unwashed microgreens to preserve their delicate texture until consumption. Washing should occur immediately before eating.
- Culinary Applications: Incorporate microgreens in cooking by sprinkling them on salads, sandwiches, soups, and main dishes for nutritional enhancement and visual appeal. Microgreens smoothies blend these nutrient powerhouses into convenient nutrition drinks. Use microgreens as a garnish for professional presentations and taste elevation.
Continuous Production: Rotating Crops for Year-Round Supply
Creating continuous microgreens production requires strategic crop rotation. Growing multiple trays sequentially ensures an ongoing supply without overwhelming storage requirements.
- Rotation Strategy: Designate specific days for planting different trays. For example, planting every 3 to 4 days means you harvest continuously. Three-tray rotation system delivers fresh homegrown microgreens weekly without intensive management. Label trays with planting dates to track growing stages.
- Scaling Your Operation: If interested in microgreens as a business opportunity, this foundation scales efficiently. Small closets or shelving units accommodate numerous trays, transforming personal consumption into modest income generation.
Troubleshooting Common Beginner Mistakes
Recognizing and avoiding common microgreens mistakes accelerates your path to consistent success.
- Overwatering: This leads to fungal issues and root rot. Remember: microgreens prefer consistent moisture, not saturation.
- Using Treated Seeds: Always verify seeds are untreated microgreen seeds safe for consumption.
- Insufficient Light: Skipping or minimizing light creates weak, pale plants. Commit to proper microgreens lighting requirements.
- Reusing Old Soil: Never reuse growing medium after harvesting—this introduces disease. Fresh soil for each crop prevents contamination.
- Neglecting Sanitation: Sterilize equipment between crops to prevent pathogen accumulation.
More Read: 12 Fast-Growing Vegetables You Can Harvest in 30 Days
Conclusion
Growing microgreens at home represents one of gardening’s most rewarding endeavors, combining simplicity, speed, nutrition, and sustainability into a single practice. Whether your motivation stems from health consciousness, environmental concerns, or simple enjoyment of fresh food production, how to grow microgreens follows straightforward principles accessible to anyone. From selecting beginner microgreen varieties like broccoli, pea, and radish, to managing growing conditions and harvesting your first tender shoots, this beginner’s guide provides everything needed for immediate success.
The investment required—minimal space, modest equipment, and basic knowledge—yields abundant fresh homegrown microgreens packed with nutrients exceeding store-bought alternatives by 4 to 40 times. Indoor superfood cultivation through microgreens growing offers year-round production regardless of climate, continuous supply through strategic rotation, and profound nutritional benefits supporting optimal health. As you embark on this indoor gardening journey, remember that these tiny, mighty plants deliver outsized returns on your minimal investment, transforming kitchens into thriving microgreen oases while elevating family nutrition and fostering a deep connection to food production.