DIY Vertical Garden Wall Step-by-Step Tutorial With Photos
Create a stunning DIY vertical garden wall with our step-by-step photo tutorial. Transform small spaces into lush green oases with space-saving.
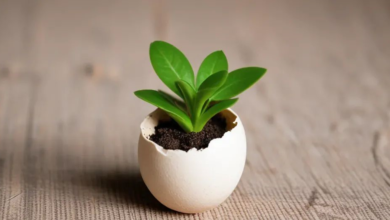
Have you ever dreamed of transforming a bare, lifeless wall into a vibrant cascade of green foliage and colorful blooms? A DIY vertical garden wall offers the perfect solution for urban dwellers, apartment residents, and anyone seeking to maximize their growing space without sacrificing precious square footage. This innovative gardening technique has revolutionized how we think about cultivating plants, bringing nature into the most unexpected places.
Vertical gardening represents more than just a trendy aesthetic choice—it’s a practical approach to creating a living wall garden that delivers impressive environmental and personal benefits. By growing plants upward rather than outward, you can cultivate up to six times more plants in the same floor space compared to traditional ground-level gardening. Whether you’re working with a tiny balcony, a narrow courtyard, or simply want to add a striking focal point to your outdoor space, a vertical garden wall provides an elegant solution.
The beauty of creating your own DIY vertical garden lies in its accessibility. You don’t need professional landscaping experience or expensive equipment to achieve stunning results. With basic tools, affordable materials, and our comprehensive step-by-step tutorial, anyone can construct a thriving green wall that becomes the centerpiece of their property. This project typically requires just a weekend of work and delivers years of enjoyment.
Beyond aesthetics, vertical wall gardens improve air quality by filtering pollutants and producing oxygen, reduce ambient noise through natural acoustic insulation, and can even help regulate temperatures in your outdoor spaces. They create habitats for beneficial insects, offer easy-access herb gardens for culinary enthusiasts, and provide therapeutic benefits through regular interaction with plants.
This detailed guide will walk you through every aspect of building your own vertical garden wall, from selecting the ideal location and gathering materials to planting techniques and ongoing maintenance. We’ll cover multiple design approaches, troubleshoot common challenges, and provide expert tips to ensure your living wall thrives for seasons to come. Whether you’re interested in growing ornamental plants, fresh herbs, vegetables, or succulents, this tutorial will equip you with all the knowledge needed to succeed.
Vertical Garden Walls
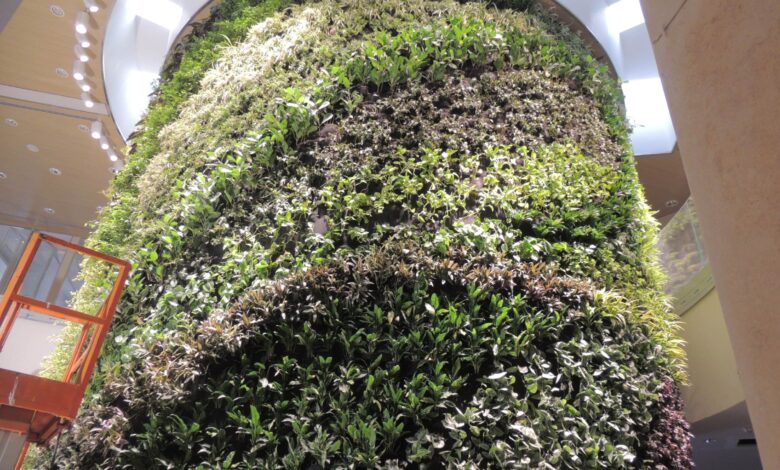
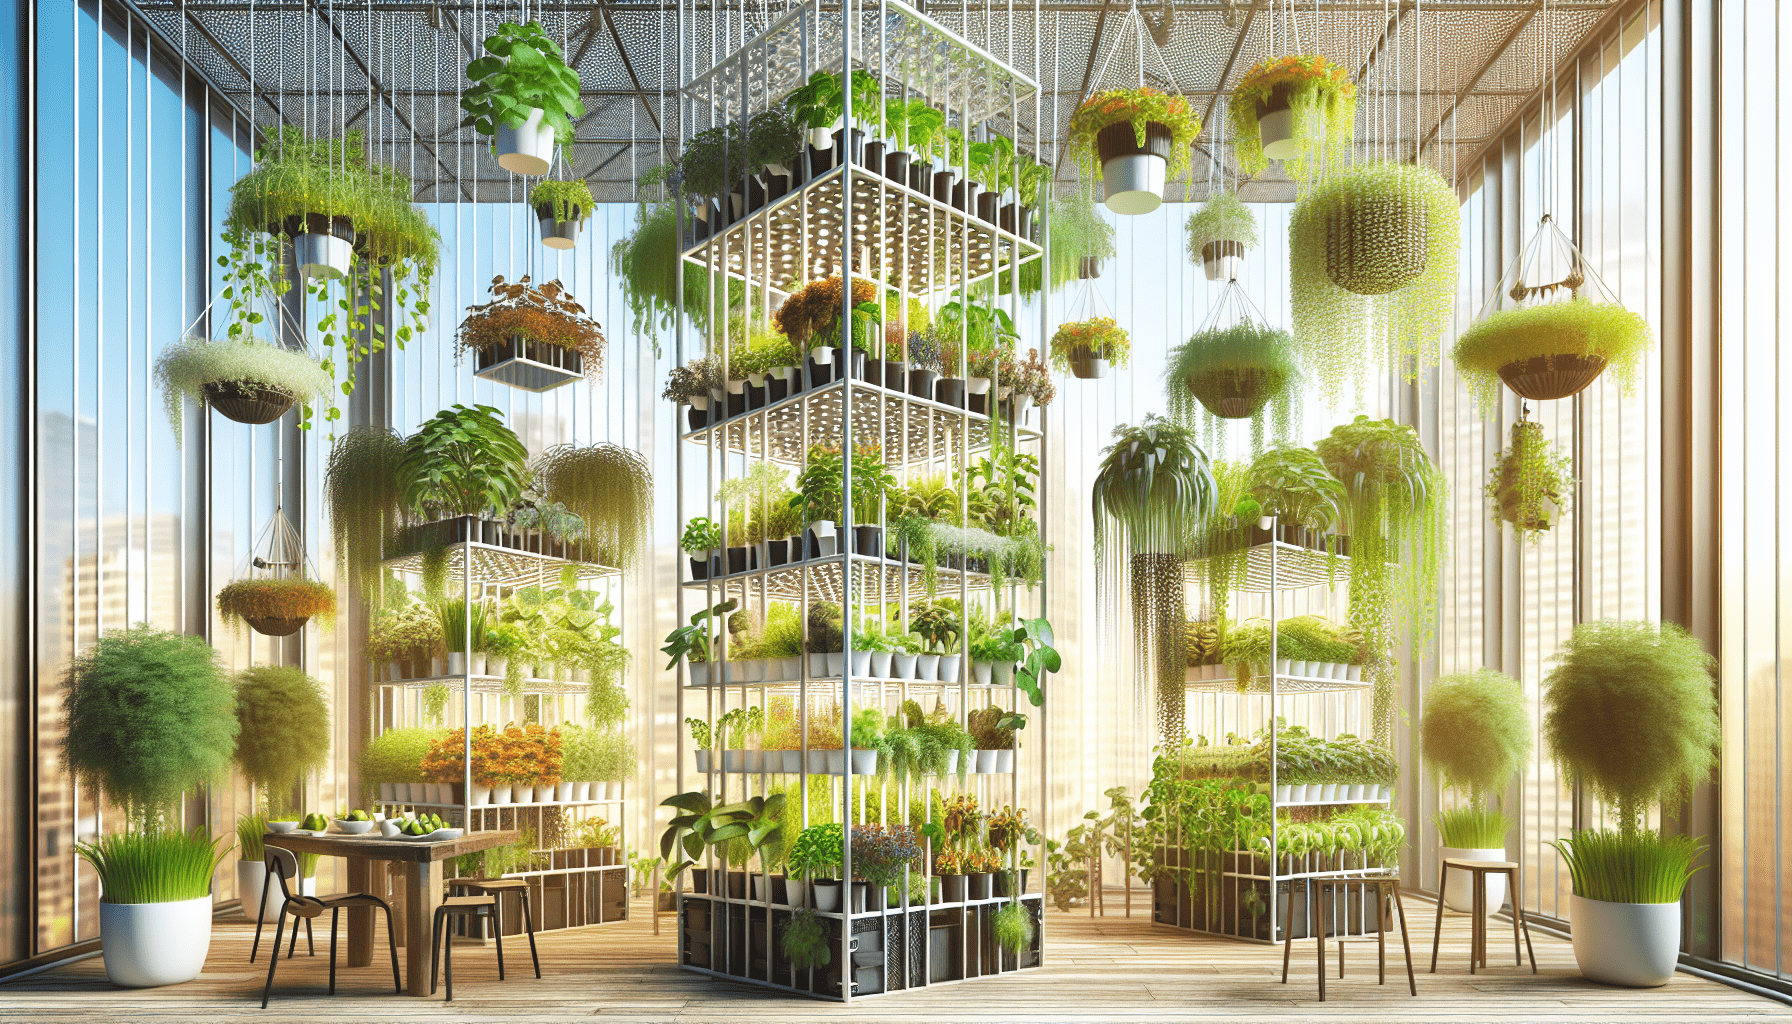
A vertical garden wall, also known as a green wall or living wall, is a method of growing plants vertically using various support structures and planting systems. This innovative approach transforms vertical surfaces into productive growing areas, making it ideal for space-saving gardening in urban environments.
What Makes Vertical Gardens Special
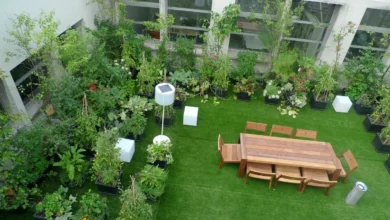
Vertical gardening systems differ fundamentally from traditional horizontal planting. Instead of spreading plants across the ground, they utilize wall-mounted structures, pocket planters, hanging containers, or modular panels to create upward growth. This vertical space utilization allows gardeners to cultivate extensive plant collections even in the smallest outdoor areas.
The concept has gained tremendous popularity as cities become denser and outdoor space becomes more limited. A well-designed vertical wall garden can accommodate 30 or more plants in just over one square foot of floor space—a remarkable achievement in space efficiency.
Types of Vertical Garden Systems
Several effective systems exist for creating DIY vertical gardens:
- Pocket planter systems use fabric or felt pockets attached to a backing structure, allowing each pocket to hold soil and plants individually. These systems offer excellent flexibility for plant selection and arrangement.
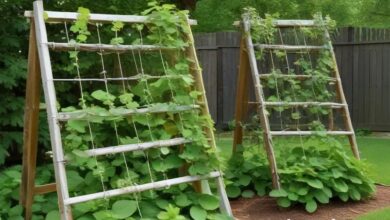
- Trellis and lattice designs provide climbing support for vining plants like tomatoes, cucumbers, and flowering vines. This traditional approach remains popular for its simplicity and effectiveness.
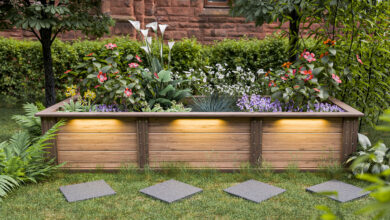
- Modular panel systems feature pre-made units that interlock or mount together, creating larger living wall installations. These often include integrated irrigation options.
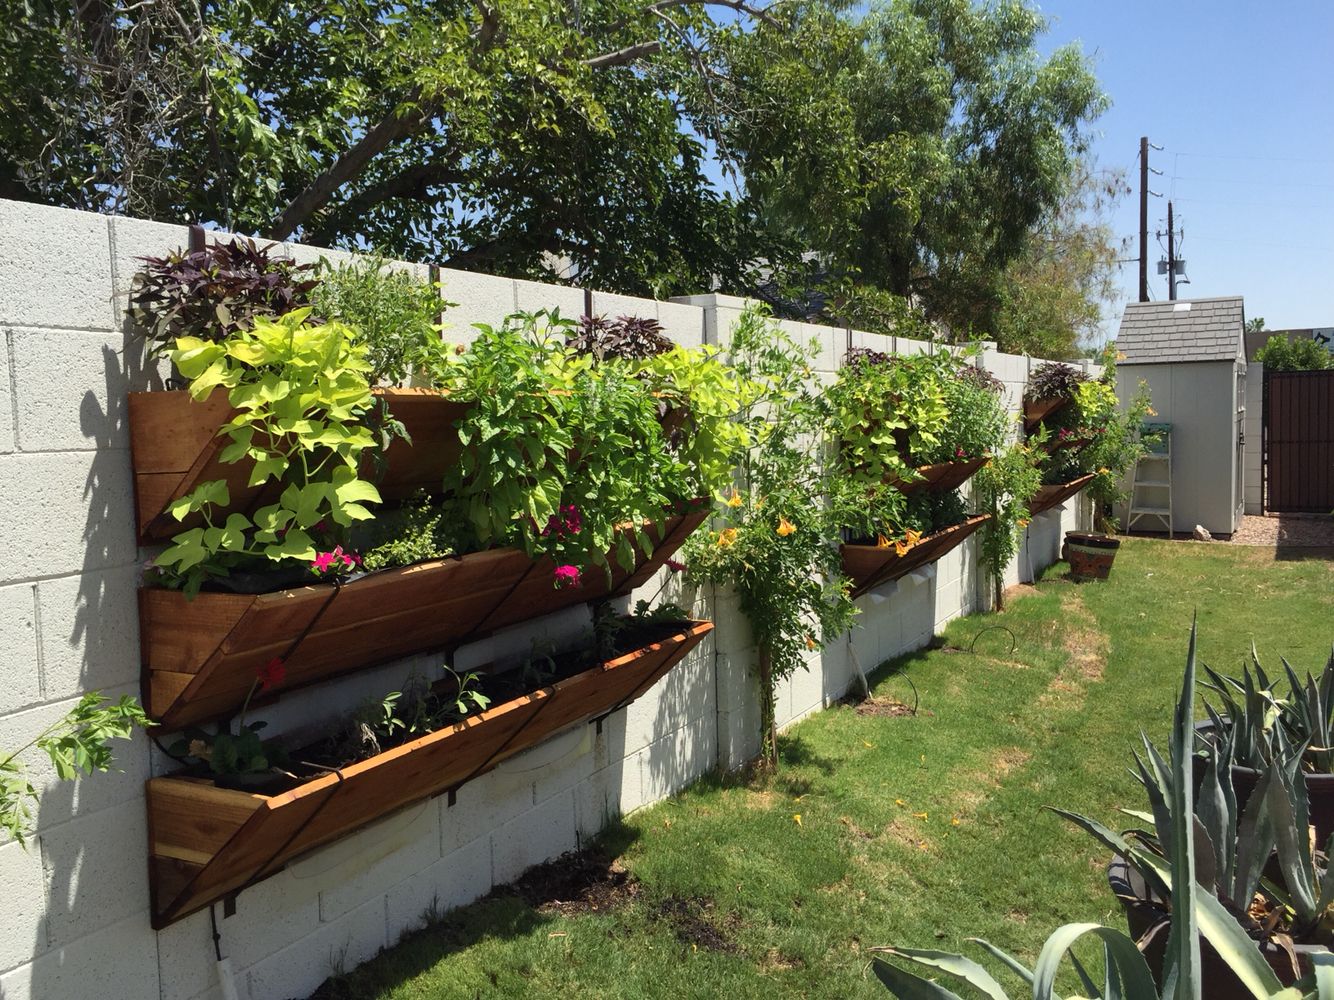
- Container-based vertical gardens use pots, planters, or boxes mounted at various heights on walls, fences, or freestanding structures. This method offers excellent drainage and easier plant replacement.
Benefits of DIY Vertical Garden Walls
Creating a vertical garden wall delivers numerous advantages that extend far beyond visual appeal. These benefits will help you appreciate the value of this sustainable gardening approach.


Space Maximization
The primary benefit of vertical gardening is its exceptional space-saving capability. Urban gardeners with limited square footage can transform unused wall surfaces into productive growing areas. This technique allows you to cultivate vegetables, herbs, flowers, and ornamental plants without requiring extensive ground space.
Improved Air Quality
Plants naturally filter airborne pollutants and toxins while producing oxygen through photosynthesis. A living wall garden acts as a natural air purifier, absorbing carbon dioxide, volatile organic compounds (VOCs), and particulate matter. This creates a healthier environment in your immediate surroundings.
Temperature Regulation
Green walls provide natural insulation, helping regulate temperatures in adjacent areas. During summer months, the evapotranspiration process from plants cools the surrounding air, making outdoor spaces more comfortable. In winter, the plant layer offers additional insulation against the cold.
Noise Reduction
The dense foliage of vertical wall gardens acts as an acoustic barrier, dampening and absorbing sound waves. This makes them particularly valuable in urban settings affected by traffic noise, industrial sounds, or other environmental disturbances.
Aesthetic Enhancement
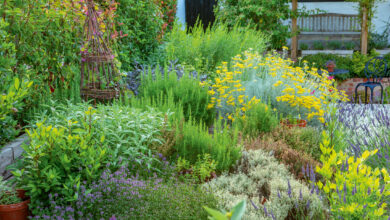
A well-designed vertical garden transforms bland walls into stunning visual focal points. The dynamic nature of living plants—with their changing colors, textures, and growth patterns—creates an ever-evolving artistic display that static decorations cannot match.
Mental Health Benefits
Numerous studies demonstrate that regular interaction with plants reduces stress levels, lowers cortisol production, decreases anxiety, and improves overall mood. Having a living wall in your daily environment brings these therapeutic benefits into your life.
Accessibility and Maintenance
Vertical gardens position plants at more accessible heights, eliminating the need for constant bending, kneeling, or stooping. This makes gardening more enjoyable for people with mobility limitations and reduces physical strain during maintenance activities.
Planning Your Vertical Garden Wall
Proper planning ensures your DIY vertical garden wall thrives and meets your specific needs. Taking time to consider key factors before construction prevents common mistakes and maximizes success.
Choosing the Perfect Location
- Location selection critically impacts your vertical garden’s success. Evaluate these factors when choosing where to build:
- Sunlight exposure determines which plants will thrive in your vertical garden. Most vegetables and flowering plants require 6-8 hours of direct sunlight daily. South-facing walls typically receive the most sun, while north-facing locations suit shade-tolerant plants like ferns and hostas.
- Wall stability and weight capacity must support your garden’s total weight, including the structure, soil, water, and plants. Ensure mounting surfaces are structurally sound. For heavy installations, consider freestanding frames rather than wall-mounted systems.
- Water access simplifies maintenance significantly. Choose locations near outdoor faucets or where installing irrigation lines is feasible. Remember that vertical gardens may require more frequent watering than ground-level plants.
- Wind exposure affects plant health and water requirements. Extremely windy locations may damage delicate plants and accelerate soil drying. Consider windbreaks or select hardier plant varieties for exposed areas.
- Visibility and enjoyment matter too. Position your living wall where you’ll see and appreciate it regularly, whether from windows, patios, or entertaining areas.
Determining Garden Size and Design
Consider these aspects when planning your vertical garden wall dimensions:
- Available space naturally limits maximum size. Measure your potential location carefully, accounting for any obstacles like windows, doors, or utilities.
- Time commitment for maintenance increases with garden size. Beginners should start with smaller installations (4-6 feet wide) before expanding.
- Budget constraints affect both initial construction and ongoing expenses. Smaller gardens using repurposed materials cost significantly less than large, professionally designed systems.
- Plant selection influences design choices. Trailing plants require strategic placement at upper levels, while upright varieties work well throughout. Consider mature plant sizes when spacing pockets or planters.
Essential Materials and Tools
Gathering quality materials before starting your DIY vertical garden wall streamlines the building process and ensures better results.
Basic Materials List
Support structure materials:
- Pressure-treated lumber (4×4 or 6×6 posts for freestanding structures)
- 2×4 or 2×6 boards for frame construction
- Metal post brackets or concrete for post installation
- Galvanized lag bolts, washers, and screws (rust-resistant)
Planting system materials:
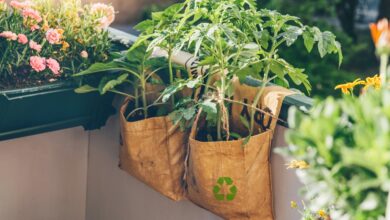
- Fabric pocket planters or felt growing bags
- Wall-mounted planter boxes or containers
- Wire mesh or netting for trellis designs
- Landscape fabric for backing
Growing medium and amendments:
- High-quality potting mix (specifically formulated for containers)
- Perlite or vermiculite for drainage improvement
- Slow-release fertilizer
Irrigation supplies (optional but recommended):
- Drip irrigation tubing or soaker hoses
- Drip emitters or spaghetti tubing
- Timer and pressure regulator
- Connectors and stakes
Tool Requirements
Construction tools:
- Circular saw or miter saw for cutting lumber
- Power drill with various bits
- Level (2-4 feet recommended)
- Tape measure
- Hammer or sledgehammer for post installation
- Wrench set for bolt tightening
Planting tools:
- Hand trowel for planting
- Pruning shears for maintenance
- Watering can or hose with a gentle spray nozzle
- Work gloves
Step-by-Step Building Instructions
Follow this comprehensive tutorial to construct your vertical garden wall from foundation to completion.
Step 1: Prepare the Site
Begin by clearing and preparing your chosen location. Remove any obstacles, vegetation, or debris from the area. If mounting to an existing wall, clean the surface thoroughly and check for structural integrity. For freestanding vertical gardens, mark post locations using stakes and string. Typical spacing ranges from 6-8 feet between posts, depending on your design. Call utility companies before digging to locate underground lines.
Step 2: Build the Support Structure
For wall-mounted systems:
Locate wall studs using a stud finder and mark their positions. Install horizontal mounting boards (2×4 or 2×6) securely into studs using lag bolts. These will support your planting system’s weight. Ensure mounting boards are perfectly level using a quality level. Even minor deviations become obvious once plants are installed.
For freestanding structures:
Dig post holes 24-30 inches deep using a post-hole digger or auger. Holes should be 3 times the post width (18×18 inches for 6×6 posts). Mix quick-setting concrete according to package directions. Pour 4-6 inches of concrete into each hole, then set post brackets while the concrete is wet. Use a string line to ensure posts align properly. Allow concrete to cure for 24 hours.
Insert posts into brackets and secure with included hardware. Check plumb on all sides using your level before final tightening. Attach horizontal support boards (2×6 or 2×4) across posts at desired heights. Pre-drill holes to prevent splitting, then secure with lag bolts and washers. These horizontals will support your planting pockets or containers.
Step 3: Install the Planting System
For pocket planter systems:
Hang your fabric pocket planters on the horizontal support boards, following the manufacturer’s instructions. Most systems include grommets or loops for easy hanging. Arrange pockets in a visually pleasing pattern, spacing them to allow adequate room for plant growth. Consider creating staggered or asymmetrical arrangements for more dynamic visual interest.
For container-based systems:
Attach mounting brackets or hangers at planned intervals along your support structure. Ensure brackets are rated for the weight of filled containers. Test-fit containers before final installation to verify proper spacing and level positioning.
Step 4: Install Irrigation (Optional)
An irrigation system dramatically reduces maintenance time and ensures consistent watering. Thread drip irrigation tubing through pocket sleeves (if equipped) or along container rows. Install drip emitters at each planting location, adjusting flow rates based on plant water needs.
Connect tubing to your water source through a pressure regulator and timer. Set the timer for early morning watering sessions, which minimize evaporation and reduce disease risk. Test your irrigation system thoroughly before planting, adjusting emitter positions and flow rates as needed.
Step 5: Add Growing Medium
Fill each pocket or container approximately halfway with high-quality potting mix. Avoid using garden soil, which compacts poorly in containers and may contain weed seeds or diseases. Mix in slow-release fertilizer according to package directions for long-term nutrition. Perlite or vermiculite additions improve drainage and aeration.
Step 6: Plant Selection and Installation
Choose plants suited to your vertical garden’s light conditions, climate, and aesthetic goals.
- For sunny locations: Consider petunias, geraniums, herbs (basil, thyme, oregano), vegetables (lettuce, cherry tomatoes), and sun-loving succulents.
- For shaded areas: Ferns, hostas, impatiens, begonias, and pothos thrive with limited sunlight.
- For edible gardens: Strawberries, leafy greens, herbs, and compact vegetable varieties work exceptionally well.
Create visual interest by combining plants with different growth habits:
- Trailing plants (sweet potato vine, lobelia) at upper levels to cascade downward
- Upright varieties (ornamental grasses, snapdragons) in the middle sections
- Spreading plants (calibrachoa, bacopa) throughout for fullness
Arrange plants while still in nursery containers to test layouts before final planting. Adjust until you achieve a balanced, appealing design. Plant carefully into pockets or containers, keeping soil levels approximately 2 inches below pocket lips or container rims. This prevents soil washout during watering. Gently firm soil around roots, eliminating air pockets that can stress plants.
Step 7: Initial Watering and Establishment
Water thoroughly immediately after planting, allowing excess to drain completely. This settles soil around roots and prevents dry pockets. Monitor closely during the first 2-3 weeks as plants establish. Container plantings dry faster than ground-level gardens, especially in warm weather or windy conditions.
Plant Selection Guide for Vertical Gardens
Choosing appropriate plants ensures your vertical garden wall thrives and looks stunning throughout the growing season.
Best Plants for Sunny Vertical Gardens
- Annual flowers: Petunias, geraniums, marigolds, zinnias, and calibrachoa provide continuous color from spring through frost.
- Herbs: Basil, oregano, thyme, rosemary, and sage thrive in full sun and provide fresh flavors for cooking.
- Vegetables: Cherry tomatoes, lettuce, spinach, peppers, and compact cucumber varieties produce abundant harvests in vertical growing systems.
- Succulents: Sedums, sempervivums, and echeverias tolerate heat and require minimal watering, perfect for low-maintenance vertical gardens.
Ideal Shade-Tolerant Plants
- Foliage plants: Ferns, hostas, caladiums, and coleus offer stunning leaf colors and textures in shaded vertical wall gardens.
- Flowering plants: Impatiens, begonias, fuchsias, and torenia bloom beautifully without full sun exposure.
- Vining plants: English ivy, pothos, and philodendron create lush, cascading effects in shaded locations.
Creating Plant Combinations
Mix plants with different characteristics for maximum visual impact:
- Thriller, filler, spiller concept: Use one dramatic upright plant (thriller), surround with medium-sized complementary plants (fillers), and add trailing varieties (spillers) for dimension.
- Color coordination: Choose harmonious color palettes or create bold contrasts. Monochromatic schemes (various shades of one color) offer sophisticated appeal, while complementary colors (opposites on the color wheel) create vibrant energy.
- Texture variety: Combine fine-textured plants (ornamental grasses, asparagus fern) with bold foliage (caladiums, coleus) and delicate flowers for interesting contrasts.
Maintenance and Care
Proper maintenance keeps your DIY vertical garden wall healthy, productive, and attractive throughout the seasons.
Watering Requirements
- Vertical gardens typically require more frequent watering than traditional in-ground plantings due to limited soil volume and increased evaporation.
- Hand watering: Use a gentle spray nozzle to avoid displacing soil or damaging foliage. Water until it begins draining from the container bottoms, ensuring thorough root zone hydration.
- Frequency: During warm months, daily watering may be necessary. Spring and fall typically require every 2-3 days. Monitor soil moisture by feeling 1-2 inches deep; water when this zone feels dry.
- Automated irrigation: Drip systems provide consistent moisture with minimal effort. Set timers for early morning watering (6-8 AM) to reduce disease risk and minimize evaporation losses.
Fertilizing Schedule
Container plants exhaust available nutrients faster than ground-level plantings, making regular fertilization essential.
- Slow-release fertilizers: Apply at planting and again mid-season following package directions. These gradually release nutrients over 3-6 months.
- Liquid fertilizers: Use water-soluble products every 2-3 weeks during active growth. Dilute to half-strength to prevent burning tender roots.
- Organic options: Compost tea, fish emulsion, and seaweed extracts provide gentle, balanced nutrition suitable for edible plants.
Pruning and Deadheading
Regular grooming maintains plant health and appearance while encouraging continued blooming.
- Deadheading: Remove spent flowers regularly to redirect energy into new bloom production. This simple practice extends flowering periods significantly.
- Pruning: Trim excessive growth to maintain desired shapes and prevent overcrowding. Remove damaged, diseased, or dead foliage promptly.
- Harvesting: For edible vertical gardens, regular harvesting of herbs and vegetables promotes continued production and prevents plants from becoming overgrown.
Pest and Disease Management
- Vertical gardens generally experience fewer pest problems than ground-level plantings, but vigilance remains important.
- Prevention: Ensure adequate air circulation between plants, avoid overwatering, and remove debris promptly.
- Early detection: Inspect plants regularly for signs of insects, disease symptoms, or nutrient deficiencies. Address problems immediately when they’re easiest to control.
- Organic controls: Use insecticidal soaps, neem oil, or companion planting to manage pests naturally. Avoid broad-spectrum pesticides that harm beneficial insects.
Seasonal Adjustments
- Spring: Replace winter-damaged plants, refresh potting mix in older installations, and adjust irrigation timing as temperatures rise.
- Summer: Monitor water needs closely during heat waves. Provide temporary shade for plants showing stress. Increase fertilization frequency to support vigorous growth.
- Fall: Gradually reduce watering and fertilization as growth slows. Remove frost-sensitive annuals before cold weather. Plant spring bulbs in pockets for early-season color.
- Winter: In cold climates, bring tender plants indoors or protect the vertical garden structure with insulating materials. Drain irrigation systems to prevent freeze damage.
Troubleshooting Common Problems
Even well-maintained vertical gardens occasionally encounter challenges. Here’s how to address common issues:
Plants Drying Out Too Quickly
- Causes: Insufficient watering, excessive wind exposure, inadequate soil depth, or full-sun exposure without adequate water capacity.
- Solutions: Increase watering frequency, install automated irrigation systems, add water-retaining polymers to soil, select drought-tolerant plants, or relocate to less exposed areas.
Poor Plant Growth
- Causes: Nutrient deficiency, inadequate sunlight, compacted soil, or improper plant selection for conditions.
- Solutions: Increase fertilization frequency, assess and improve light conditions, refresh potting mix, or replace with plants better suited to your environment.
Soil Washing Out
- Causes: Overwatering, poorly designed drainage, and missing or inadequate pocket barriers.
- Solutions: Reduce water pressure, improve drainage holes, add landscape fabric liners, or adjust irrigation emitter output.
Algae or Mold Growth
- Causes: Excessive moisture, poor air circulation, or prolonged shade on containers.
- Solutions: Improve spacing between plants, increase air flow, reduce watering frequency, or treat with diluted vinegar solution.
Advanced Vertical Garden Techniques
Once you’ve mastered basic vertical garden wall construction, explore these advanced approaches:
Hydroponic Vertical Gardens
Hydroponic systems eliminate soil entirely, growing plants in nutrient-enriched water solutions. These systems offer faster growth rates, higher yields, and exceptional space efficiency. Components include water reservoirs, circulation pumps, growing channels or towers, and specialized nutrient solutions. While requiring more initial investment, hydroponic vertical gardens produce impressive results for vegetables and herbs.
Living Wall Art and Designs
Create patterns, logos, or artistic designs using plants with different foliage colors. Succulent-based living wall art remains popular for its durability and low maintenance requirements. Plan designs carefully on graph paper before installation, marking plant placement for each color or texture. This ensures your living artwork develops as envisioned.
Indoor Vertical Gardens
Bring vertical gardening indoors using specialized systems with integrated LED grow lights. Indoor living walls purify air, humidify spaces, and provide year-round gardening opportunities. Select plants tolerant of lower light and stable temperatures. Pothos, philodendron, ferns, and certain herbs adapt well to indoor environments.
Automated Smart Systems
Modern technology enables app-controlled irrigation systems, moisture sensors, and automatic fertilizer injection. These systems optimize plant care while minimizing hands-on maintenance. Smart controllers adjust watering based on weather conditions, soil moisture levels, and plant-specific requirements, ensuring optimal growing conditions automatically.
Budget-Friendly DIY Alternatives
Building a vertical garden wall doesn’t require substantial financial investment. Consider these economical approaches:
Pallet Vertical Gardens
Reclaimed wooden pallets provide ready-made structures for vertical planting. Simply add landscape fabric backing, fill with soil, and plant through the slats.
- Advantages: Free or low-cost materials, rustic aesthetic appeal, customizable with paint or stain.
- Considerations: Ensure pallets are heat-treated (marked “HT”) rather than chemically treated. Chemical treatments may leach into the soil.
Hanging Gutter Gardens
Mount sections of vinyl gutters horizontally at varying heights to create simple but effective vertical gardens.
- Installation: Attach gutter sections to walls or fences using mounting brackets. Drill drainage holes every 12 inches. Fill with potting mix and plant.
- Best uses: Shallow-rooted plants like lettuce, strawberries, herbs, and annual flowers thrive in gutter gardens.
Shoe Organizer Planters
Repurposed over-the-door shoe organizers work surprisingly well as vertical planters. Hang on fences, walls, or railings and fill pockets with soil.
- Advantages: Extremely affordable, readily available, and multiple pockets for varied plantings.
- Limitations: Relatively short lifespan (1-2 seasons), limited to smaller plants with shallow root systems.
Repurposed Container Gardens
Mount any containers—tin cans, plastic bottles, mason jars, terracotta pots—on vertical surfaces using wire, brackets, or shelving systems. Creative approach: Paint containers in coordinating colors, create patterns with different sizes, or arrange in geometric designs for custom vertical garden art.
Environmental Sustainability Considerations
Building sustainable vertical gardens benefits both your immediate environment and the broader ecosystem.
Water Conservation Strategies
- Drip irrigation delivers water directly to root zones with minimal waste. Combine with timers and moisture sensors to optimize efficiency.
- Mulching: Add thin layers of organic mulch around plants to reduce evaporation and moderate soil temperatures.
- Rainwater collection: Install rain barrels to capture roof runoff for irrigation use. This reduces municipal water consumption and provides plants with natural, chemical-free moisture.
Organic Growing Practices
Avoid synthetic pesticides and fertilizers in favor of organic alternatives. These protect beneficial insects, prevent chemical runoff, and ensure safe harvests from edible vertical gardens.
- Companion planting: Integrate pest-deterrent plants like marigolds and nasturtiums throughout your vertical garden to naturally repel common garden pests.
- Compost integration: Use homemade compost in potting mixes to recycle nutrients and improve soil structure sustainably.
Supporting Beneficial Wildlife
Living walls create valuable habitat for pollinators, beneficial insects, and small wildlife.
Include flowering plants attractive to bees, butterflies, and hummingbirds. Avoid pesticide use to protect these important garden allies.
Inspiration and Design Ideas
Draw inspiration from these creative vertical garden concepts to personalize your project:
Herb Spiral Walls
Combine vertical and spiral design principles to create tiered herb gardens with different microclimates. Place sun-loving herbs at the top tiers and shade-tolerant varieties below.
Succulent Tapestries
Create a living artwork using drought-tolerant succulents in various colors, shapes, and textures. These low-maintenance installations develop stunning patterns over time.
Edible Living Walls
Dedicate entire vertical gardens to food production. Combine lettuce, kale, strawberries, cherry tomatoes, peppers, and culinary herbs for fresh, organic harvests.
Pollinator Paradise Walls
Select flowering plants specifically attractive to bees, butterflies, and hummingbirds. Include diverse bloom times for season-long pollinator support.
Tropical-Themed Installations
Create lush, jungle-like atmospheres using large-leafed plants like philodendrons, ferns, bromeliads, and tropical flowering species.
More Read: Vertical Gardening Grow More in Less Space
Conclusion
Building a DIY vertical garden wall transforms unused spaces into thriving green sanctuaries that deliver beauty, functionality, and environmental benefits. This space-saving gardening technique empowers urban dwellers and homeowners alike to maximize their growing potential regardless of property size. Through careful planning, quality materials, appropriate plant selection, and consistent maintenance, anyone can create stunning living walls that become cherished features of their outdoor spaces.
Whether you’re growing fresh herbs for culinary adventures, cultivating vibrant flowers for visual impact, or producing vegetables for sustainable living, vertical gardens offer endless possibilities. Start your vertical gardening journey today with this comprehensive tutorial, and watch as your bare walls transform into lush, living works of art that enhance your environment and enrich your daily life for years to come.